How to Configure Privileged Identity Management (PIM) for Microsoft Entra Roles
A complete and practical guide for IT administrators to configure Microsoft Entra PIM using best practices, JIT access, MFA enforcement, and role governance to eliminate standing privileged access and enhance organizational security.
In the world of cloud security, privileged accounts are the crown jewels. A compromised administrator account can lead to catastrophic data breaches, service disruptions, and reputational damage. The traditional model of permanent, standing administrative access is a significant risk. This is where Microsoft Entra Privileged Identity Management (PIM) comes in, providing a framework for Just-in-Time (JIT) access to secure these critical roles.
PIM is a cornerstone of a Zero Trust security strategy, ensuring that users only have privileged access for the limited time they need it, and only after following a secure activation process. This drastically reduces the window of opportunity for attackers.
This article provides a comprehensive, step-by-step guide for IT administrators to configure PIM for Microsoft Entra roles. We will cover everything from initial setup to assigning eligible roles and defining activation requirements, empowering you to significantly enhance your organization's security posture.
What is Privileged Identity Management (PIM)?
Privileged Identity Management (PIM) is a service in Microsoft Entra ID that enables you to manage, control, and monitor access to important resources in your organization. Instead of giving administrators permanent (or "standing") access, PIM allows you to make them eligible for a role. They can then activate that role on-demand for a limited time when they need to perform privileged tasks.
🔑 Key Features of PIM:
- Just-in-Time (JIT) Access: Users get privileged access only when they need it.
- Time-Bound Assignments: Access has a defined start and end date.
- Approval Workflow: Require approval from designated users before a role can be activated.
- MFA Enforcement: Mandate Multi-Factor Authentication to activate any role.
- Justification: Require users to provide a reason for activating a role.
- Full Audit History: Get detailed logs of all PIM activities for compliance and investigation.
Understanding Eligible vs Active Assignments
One of the core concepts in PIM is the distinction between Eligible and Active role assignments. This table clarifies the key differences:
| Aspect | Eligible Assignment | Active Assignment |
|---|---|---|
| Access Type | Just-in-Time (JIT) - Must be activated | Standing - Always active |
| Security Posture | ✅ High - Minimal attack surface | ⚠️ Lower - Permanent exposure |
| Activation Required | Yes - User must request and activate | No - Immediate access |
| MFA Enforcement | ✅ Can be required at activation | ❌ Not applicable |
| Approval Workflow | ✅ Can be configured | ❌ Not applicable |
| Time-Bound | ✅ Yes - Expires after duration | ⚠️ Typically permanent |
| Audit Trail | ✅ Detailed logs of all activations | ⚠️ Only assignment changes logged |
| Best Practice | ✅ Recommended for all privileged roles | ❌ Avoid except for emergency accounts |
PIM Activation Flow
Understanding how PIM works is crucial. The diagram below illustrates the complete activation flow from user request to audit trail:

Figure: Complete PIM activation workflow showing request, MFA, approval, activation, expiration, and audit stages.
Step-by-Step Guide: Configuring PIM for Entra Roles
Let's walk through the process of setting up PIM for a critical Microsoft Entra role, such as the Exchange Administrator.
📋 Prerequisites
Before you begin, ensure you have:
- License: Microsoft Entra ID P2 or Microsoft Entra ID Governance.
- Permissions: You must be a Privileged Role Administrator or Global Administrator.
Step 1: Navigate to Privileged Identity Management
Sign in to the Microsoft Entra admin center. In the left navigation menu, go to Identity governance > Privileged Identity Management. This is your central dashboard for all PIM-related activities.
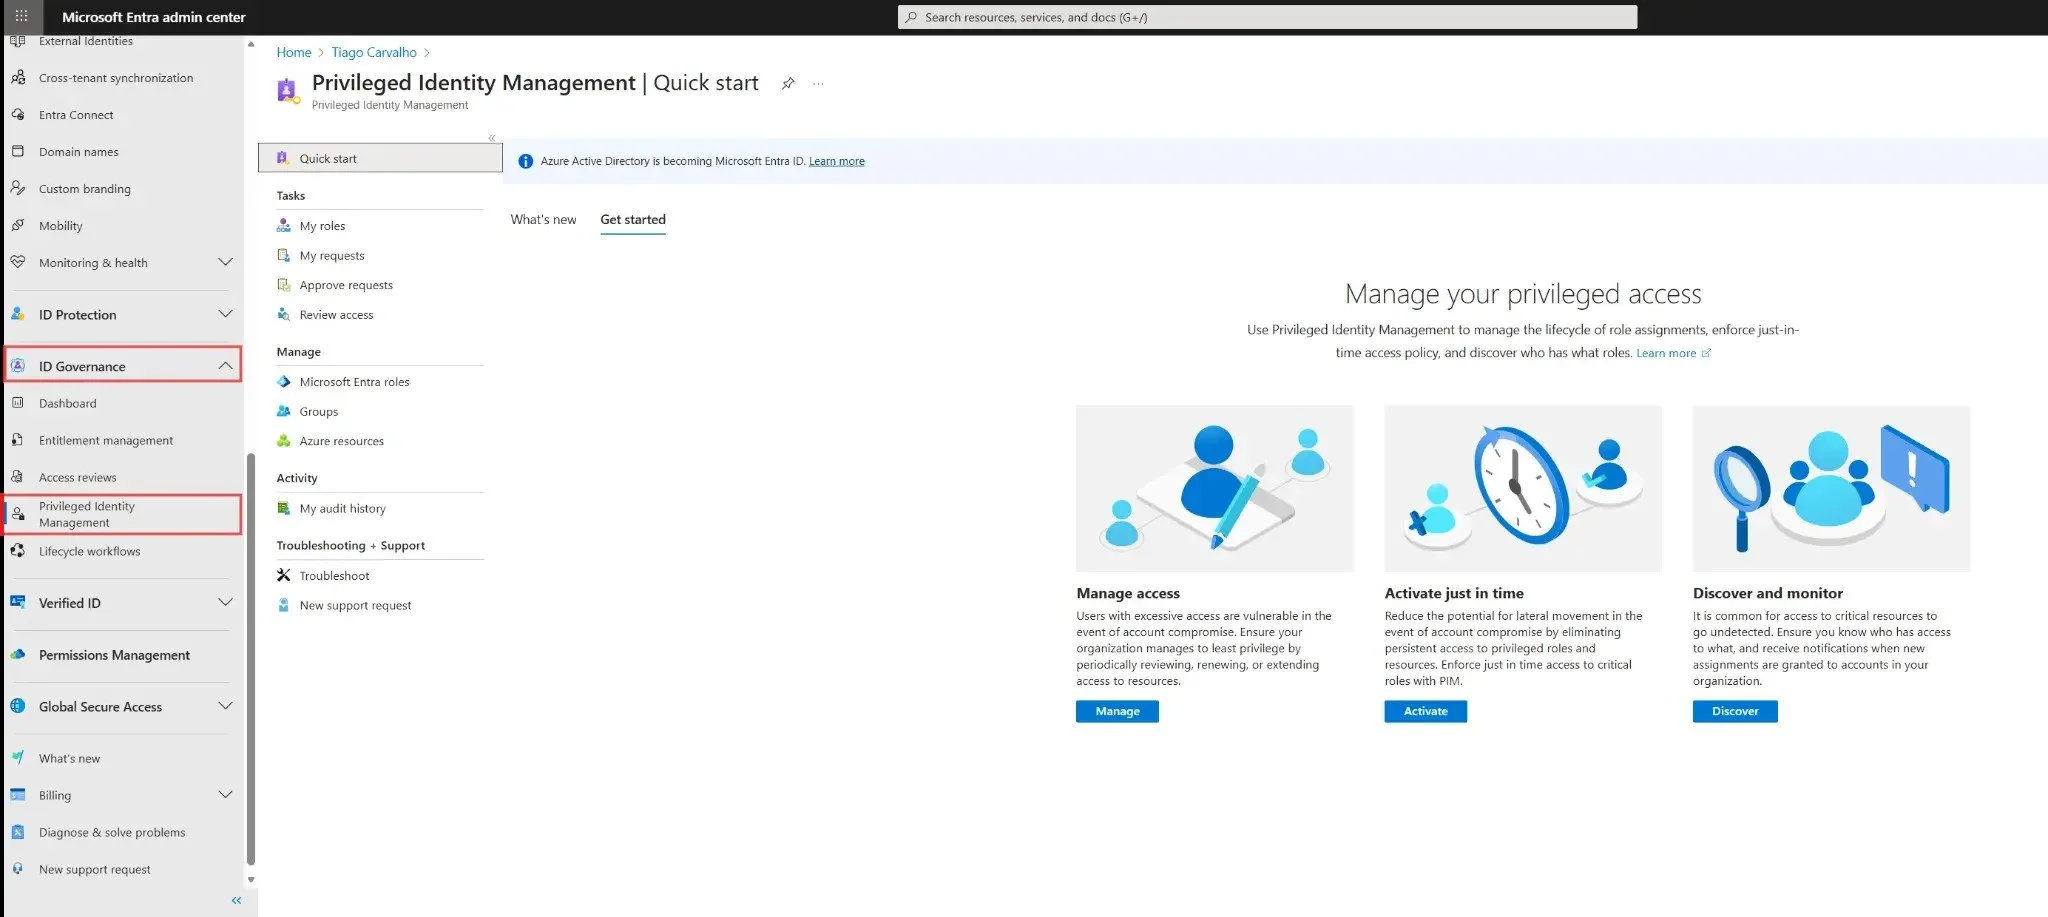
Figure 1: The Privileged Identity Management overview page showing the Quick start dashboard.
Step 2: Select Microsoft Entra Roles
Under the Manage section in the PIM navigation, click on Microsoft Entra roles. This will take you to the management area for all built-in and custom roles within Microsoft Entra ID.
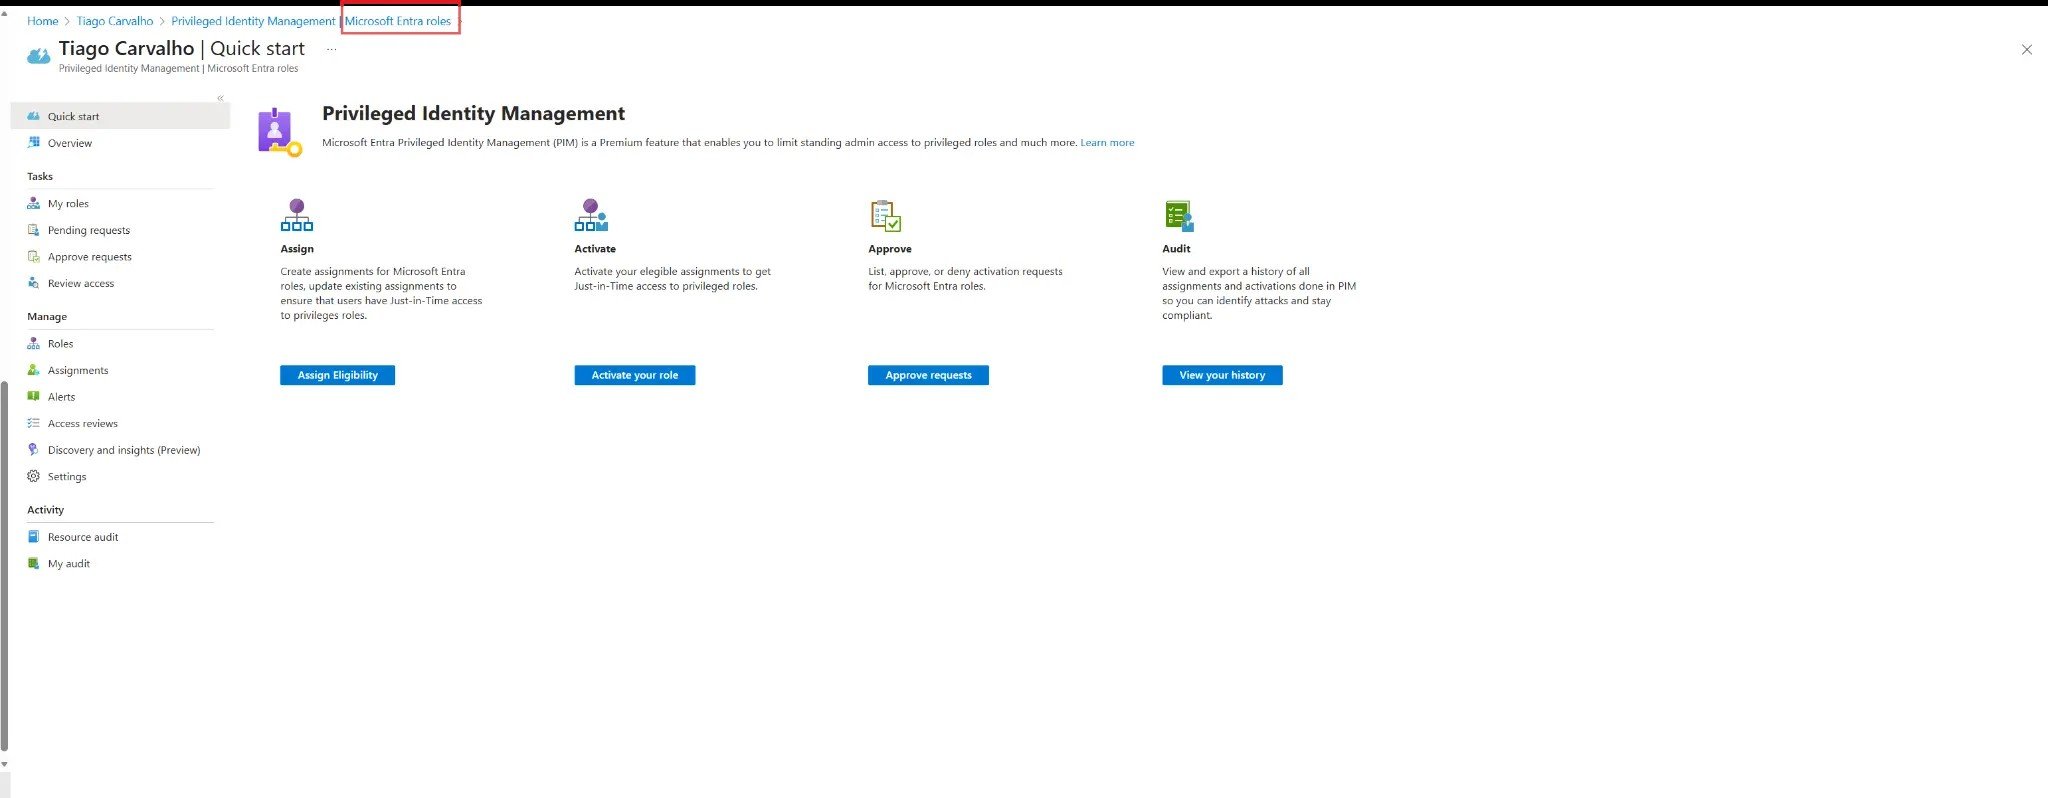
Figure 2: Microsoft Entra roles management page with options to Assign, Activate, Approve, and Audit.
Step 3: Configure Role Settings
Before assigning roles, it's crucial to define the activation requirements. Click on Role settings and find the role you want to configure (e.g., "Exchange Administrator"). Click on it to open the settings blade.
- Click Edit to customize the settings.
- Set the Activation maximum duration (hours). A best practice is 8 hours or less.
- Enable On activation, require: Microsoft Entra multifactor authentication. This is a critical security step.
- (Optional) Enable Require justification on activation to force users to state their reason.
- (Optional) Enable Require approval to activate and select approvers for highly sensitive roles.
- Click Update to save the settings.
⚠️ Important: Always require MFA for the activation of any privileged role. This is a non-negotiable security baseline.
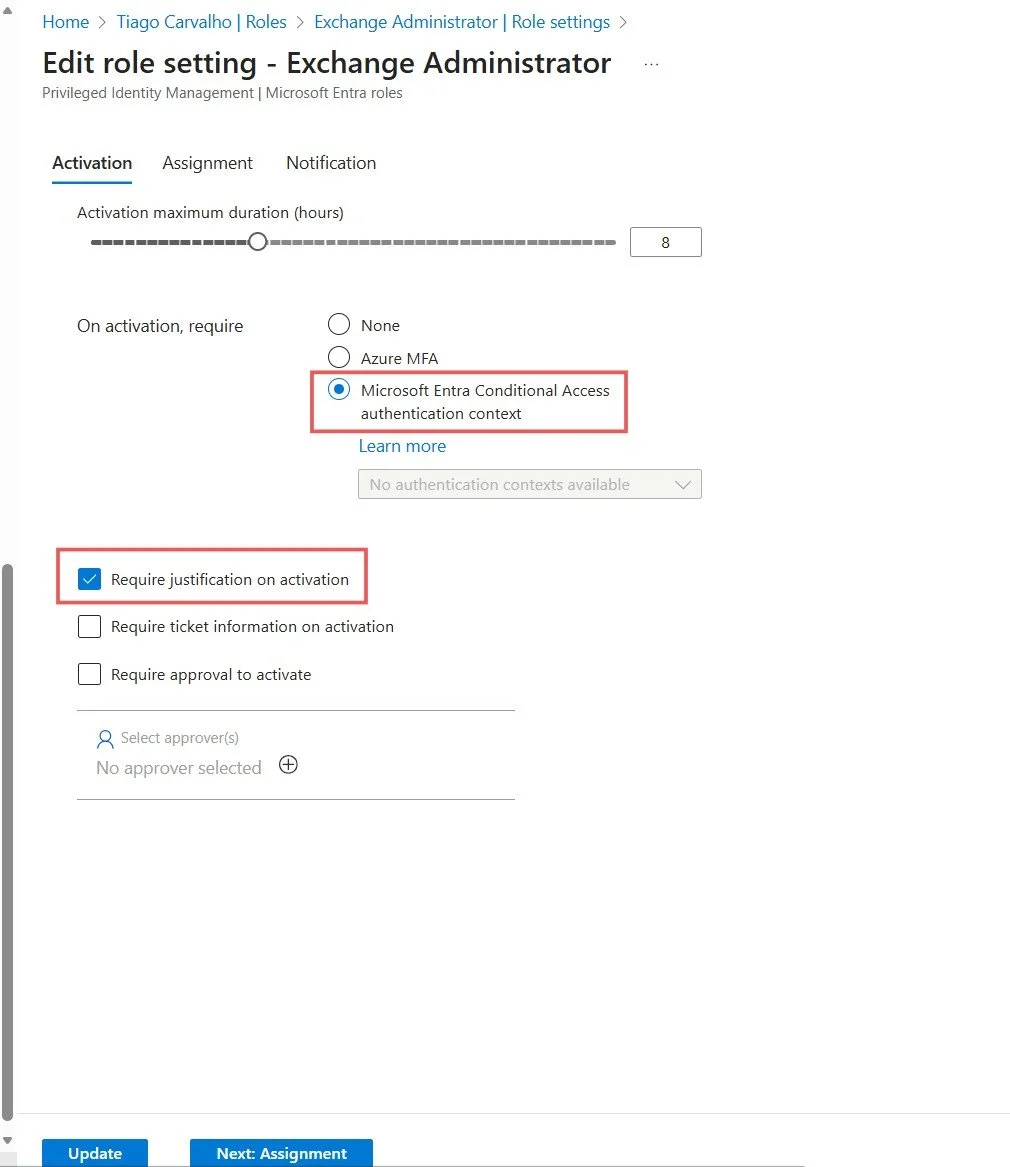
Figure 3: Configuring activation requirements including MFA and justification for the Exchange Administrator role.
Step 4: Assign an Eligible Role
Now, let's make a user eligible for the role. Go back to the Microsoft Entra roles page and click on Assignments. Click + Add assignments.
- Select role: Choose the role you just configured (e.g., "Exchange Administrator").
- Select member(s): Find and select the user(s) you want to make eligible.
- Click Next.
- On the settings page, ensure the Assignment type is set to Eligible (not Active).
- Set the duration. You can make it permanently eligible or set a time-bound assignment.
- Click Assign.
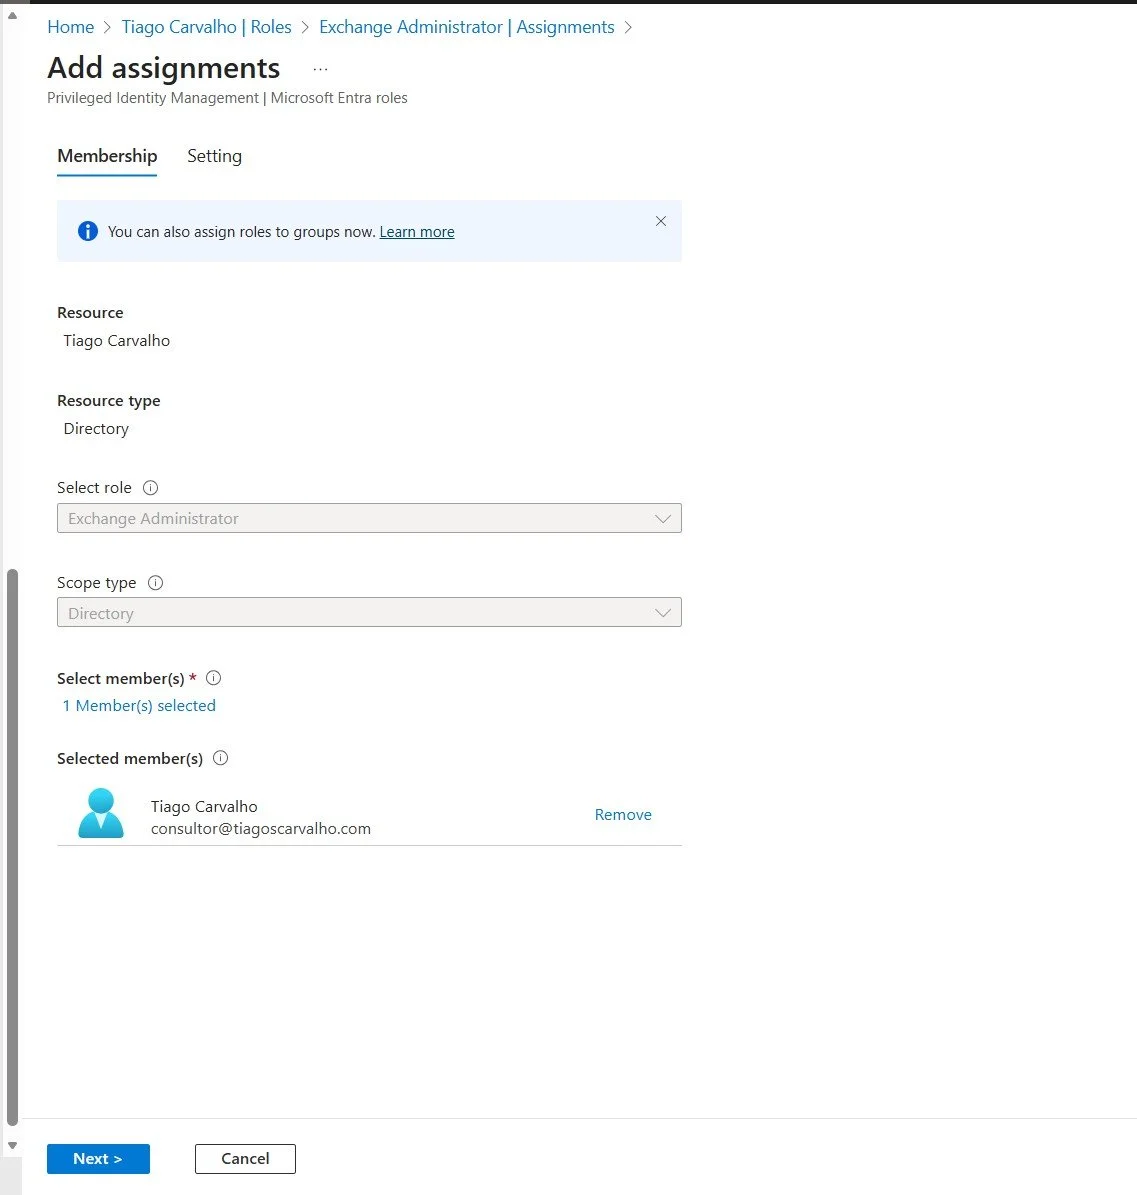
Figure 4: Selecting the user to make eligible for the Exchange Administrator role.
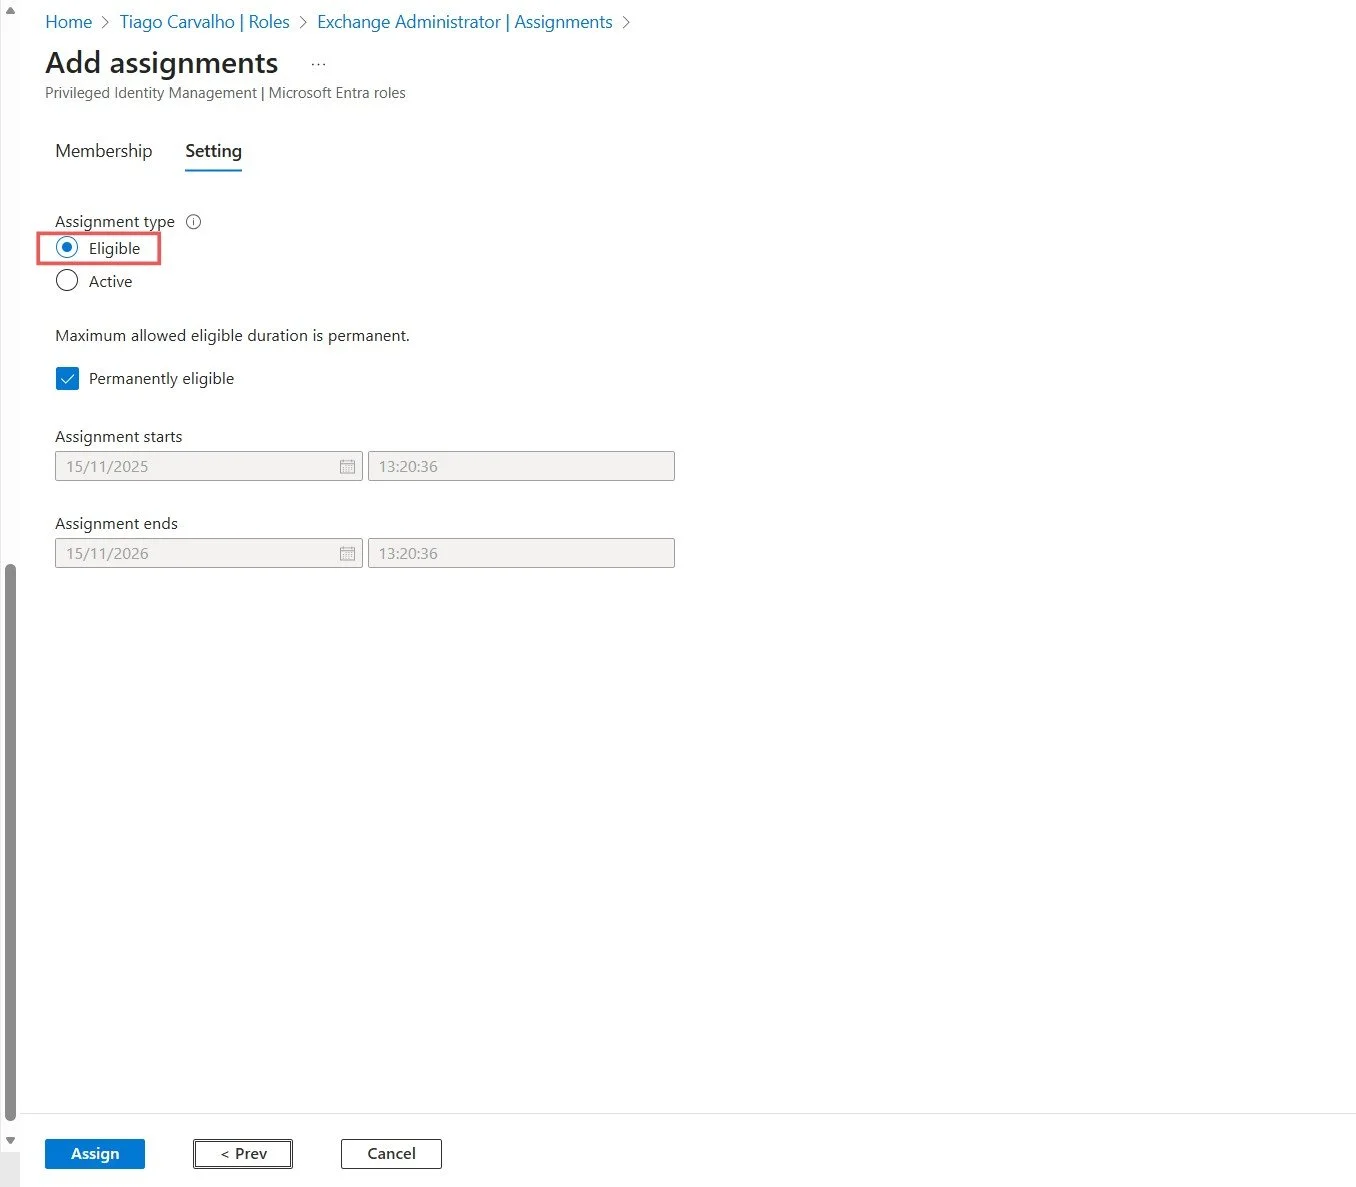
Figure 5: Configuring the assignment type as Eligible with permanent duration.
Step 5: User Experience - Activating the Role
The assigned user can now activate their role when needed. They would navigate to the My roles section in PIM, find their eligible assignment, and click Activate. They will be prompted to complete MFA and provide a justification (if configured). Once activated, they will have the role's permissions for the duration specified in the role settings.
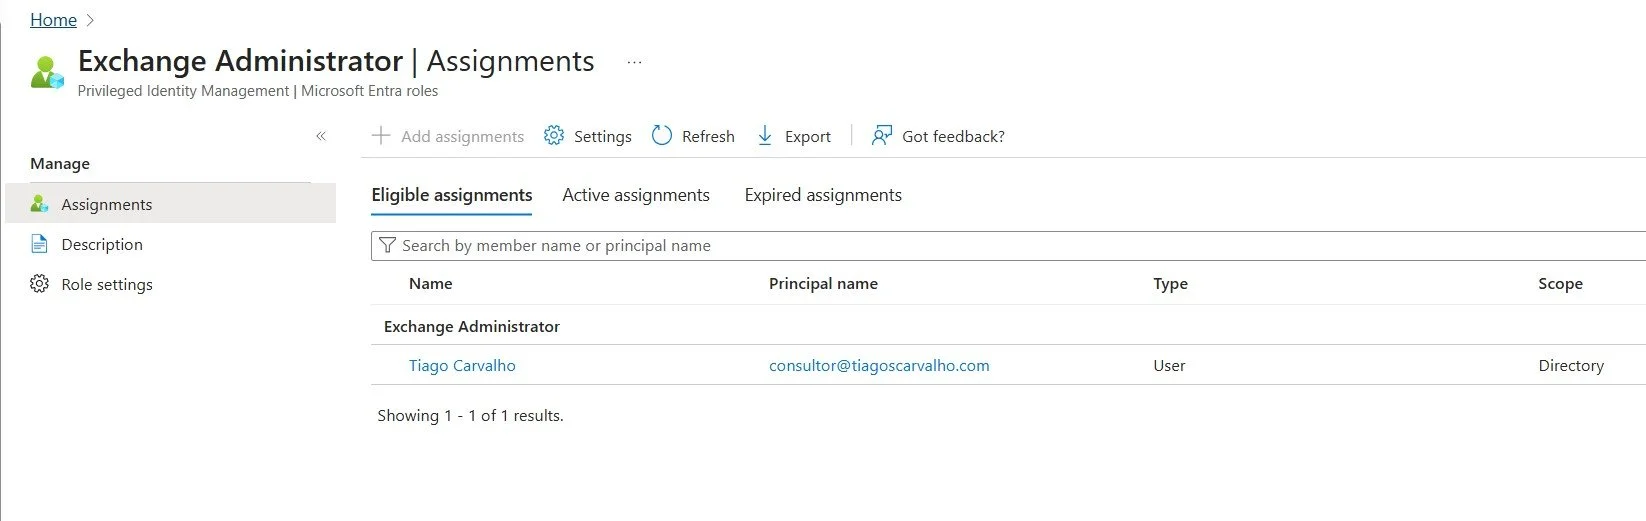
Figure 6: The eligible assignments list showing the user successfully assigned to the Exchange Administrator role.
Best Practices for PIM Success
Implementing PIM is a significant step, but maintaining it is just as important. Follow these best practices:
- Least Privilege Principle: Only make users eligible for the roles they absolutely need. Avoid over-provisioning.
- Remove Standing Access: Audit your existing roles and remove all permanent (active) assignments for privileged roles. Convert them to eligible assignments in PIM.
- Regular Access Reviews: Use PIM's access review feature to periodically re-certify that users still need their eligible assignments.
- Monitor Audit Logs: Regularly review the PIM audit logs to monitor for unusual or suspicious activation patterns.
Conclusion
By configuring Privileged Identity Management, you have replaced high-risk, standing administrative access with a secure, auditable, and compliant Just-in-Time model. This is a foundational element of a modern Zero Trust architecture and one of the most impactful security measures you can implement to protect your organization's most sensitive resources.
This guide provides the blueprint. Now, it's time to build a more secure future for your organization, one eligible assignment at a time.
References
- Microsoft. (2025). What is Privileged Identity Management?. Microsoft Learn. https://learn.microsoft.com/en-us/entra/id-governance/privileged-identity-management/pim-configure
- Microsoft. (2025). Start using Privileged Identity Management. Microsoft Learn. https://learn.microsoft.com/en-us/entra/id-governance/privileged-identity-management/pim-getting-started
- Microsoft. (2025). Plan a Privileged Identity Management deployment. Microsoft Learn. https://learn.microsoft.com/en-us/entra/id-governance/privileged-identity-management/pim-deployment-plan