Compliance · Microsoft Purview · Information Protection · 2026
Copilot generates responses using content your users can already access. That sounds obvious — but it has a concrete implication: if a document labelled "Confidential" has no encryption behind it, Copilot can summarise it, quote from it, and surface it across the tenant. Sensitivity labels are how you close that gap. They attach classification and optional protection directly to content, so the label travels with the file regardless of where it ends up.
This guide walks through the entire setup in Microsoft Purview — from the one tenant setting most admins miss, to creating your first label, configuring access control and scope, and publishing a label policy to users. All screenshots are from a real Microsoft 365 tenant.
The prerequisite you cannot skip
Before creating any labels, navigate to Microsoft Purview → Information Protection → Sensitivity labels. If your tenant has never enabled label-based encryption for SharePoint and OneDrive, you will see a yellow banner at the top of the page.
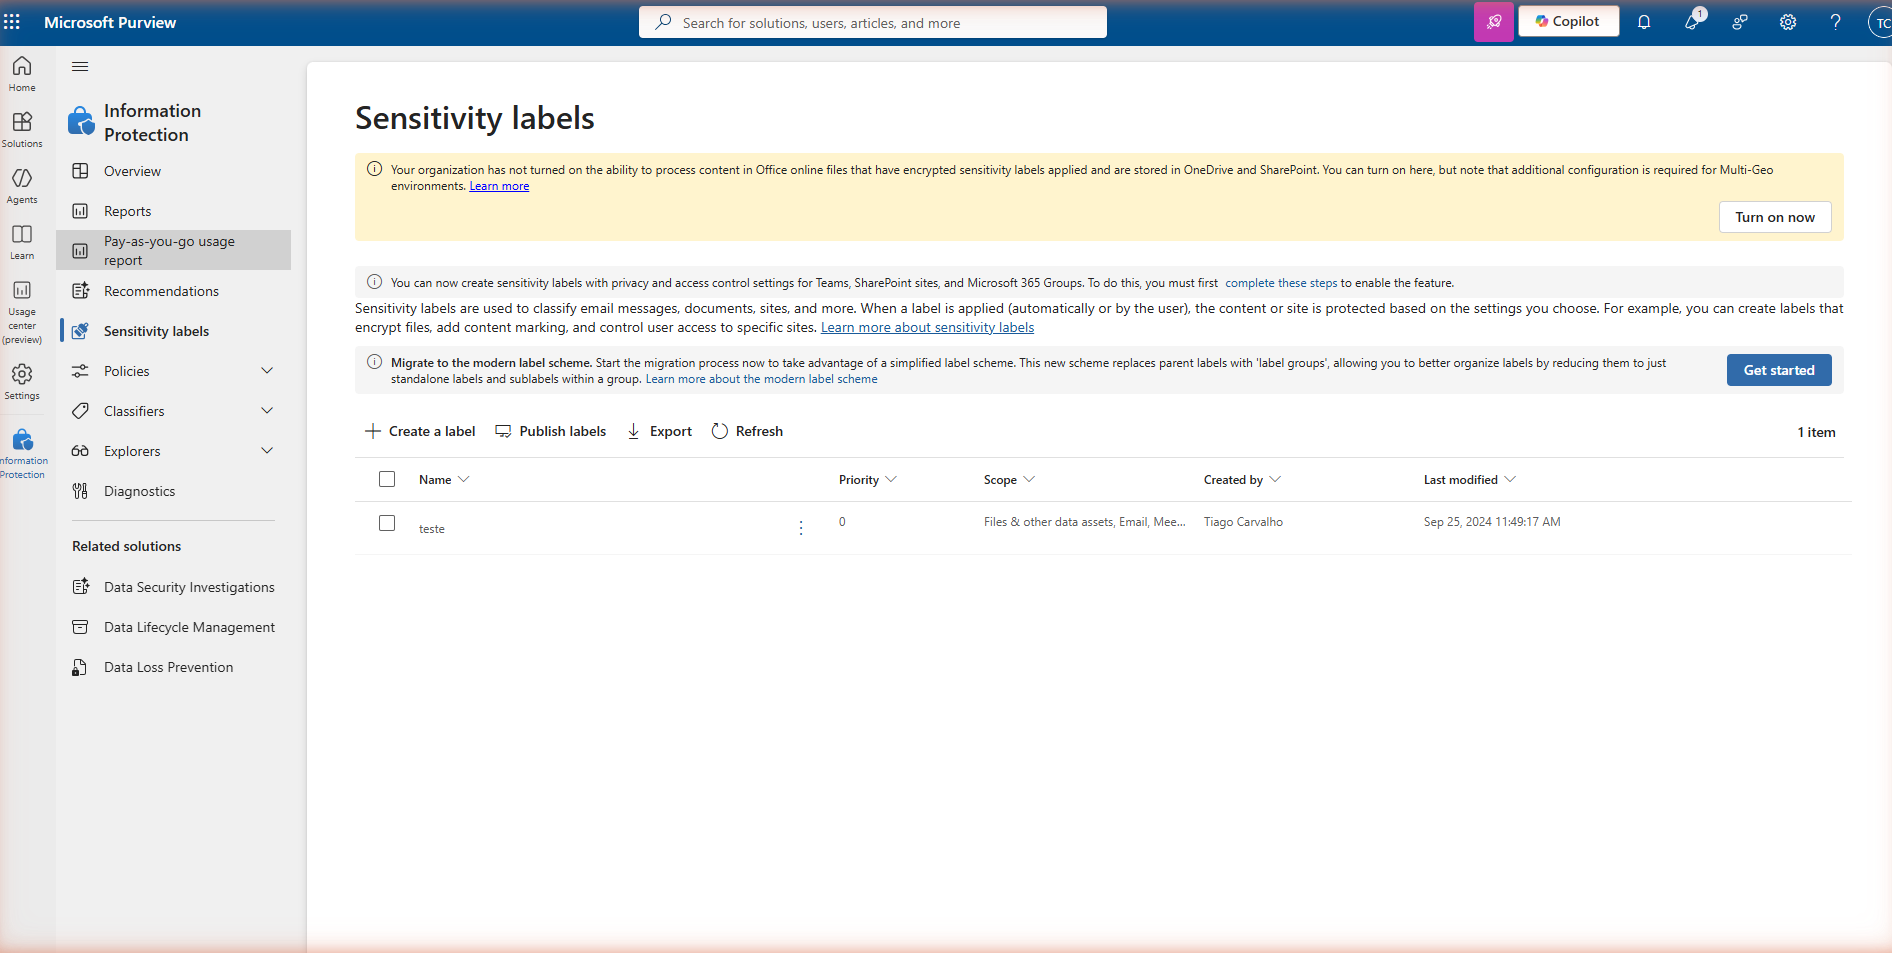
The banner reads: "Your organization has not turned on the ability to process content in Office online files that have encrypted sensitivity labels applied and are stored in OneDrive and SharePoint."
Creating your first label
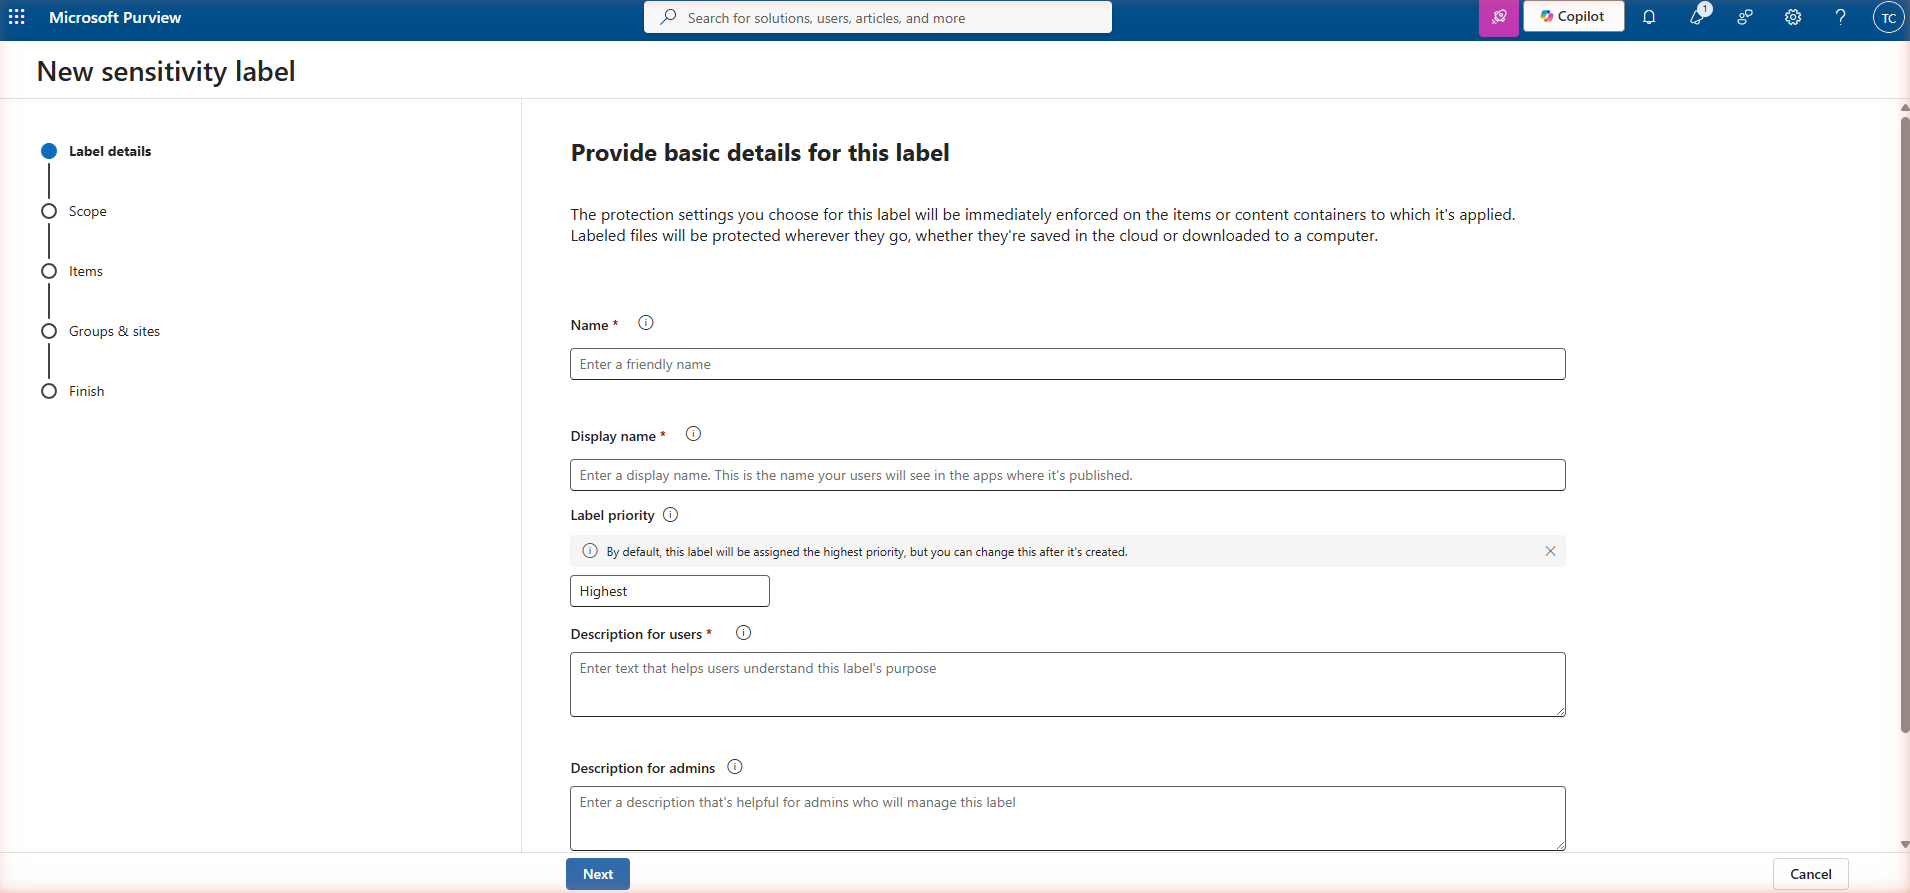
From the Sensitivity labels page, click + Create a label. The wizard opens with five steps in the left navigation: Label details → Scope → Items → Groups & sites → Finish.
Step 1 — Label details
Fill in the label name and description. The Name field is the internal identifier (visible to admins). The Display name is what users see in Office apps — keep it short and clear. The Description for users appears as a tooltip when a user hovers over the label in Word, Outlook or Teams — make it actionable.
Step 2 — Scope
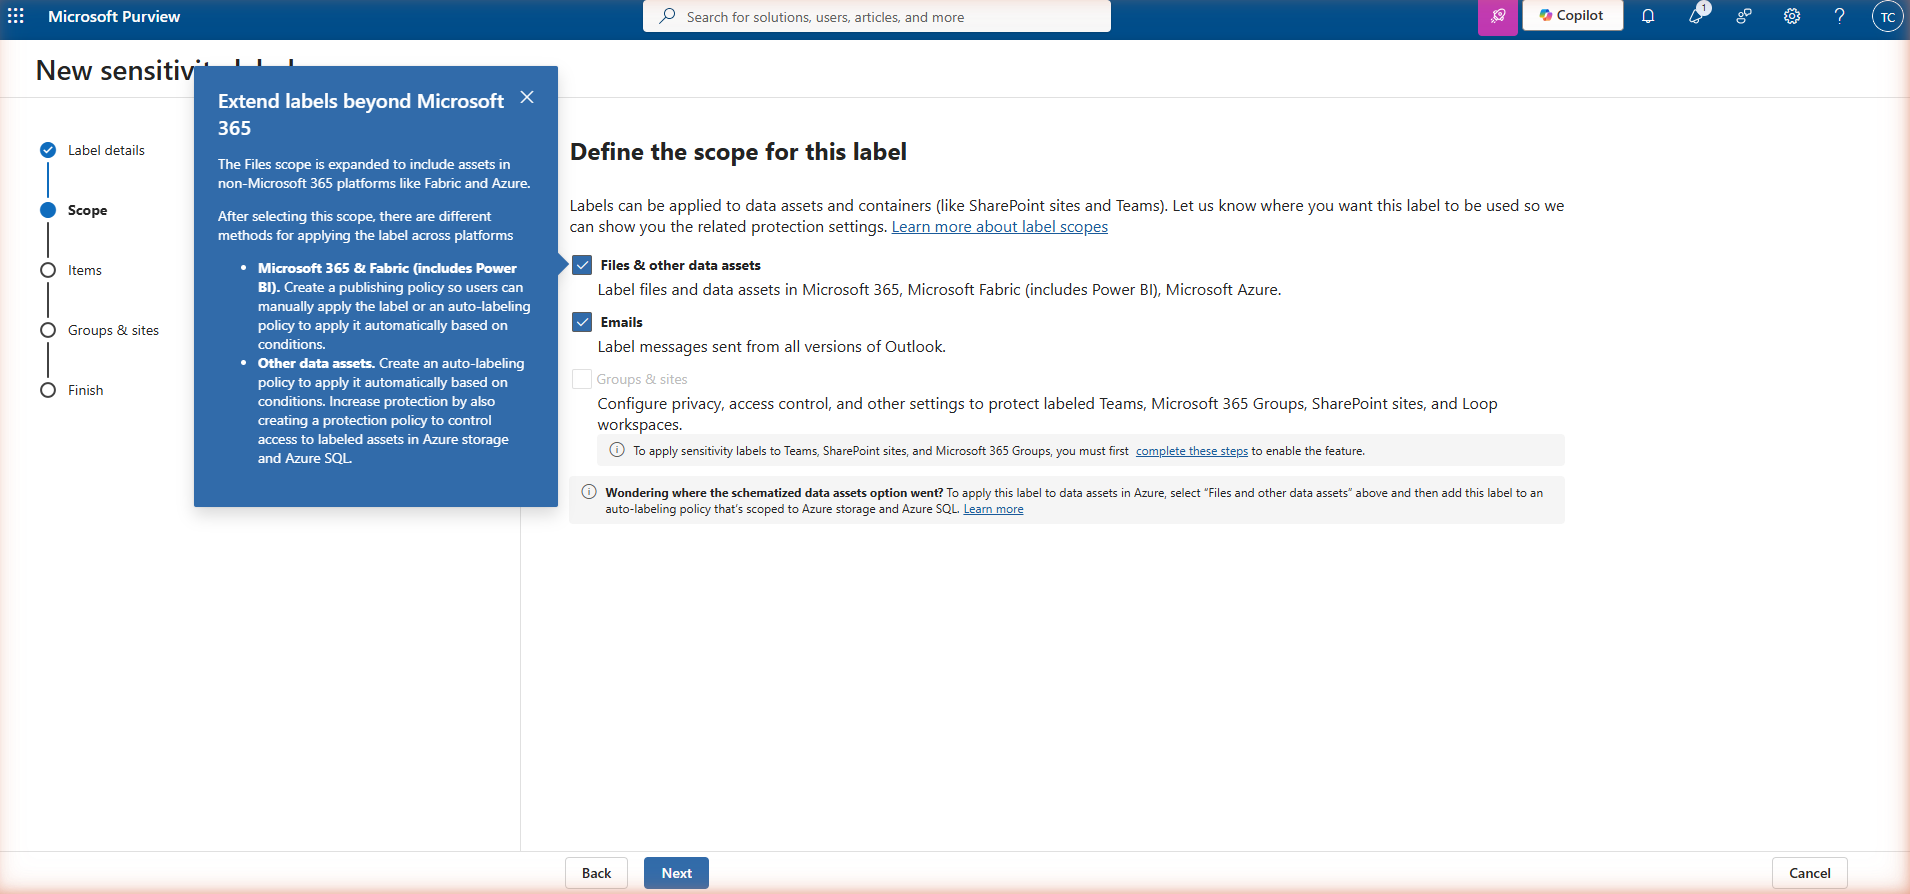
Scope determines which types of content the label can be applied to. The wizard shows three options.
| Scope option | What it covers | Copilot relevance |
|---|---|---|
| Files & other data assets | Office files, PDFs, and data assets in Microsoft 365, Fabric, and Azure | High — Copilot draws primarily from files in SharePoint and OneDrive |
| Emails | Messages in all versions of Outlook | Medium — Copilot can summarise email threads with the right licence |
| Groups & sites | Teams, Microsoft 365 Groups, SharePoint sites, Loop workspaces | High — container-level labels set the default classification for all content within a site or team |
Step 3 — Items: access control and content marking
The Items step is where a label gains real protection capability. It presents two checkboxes.
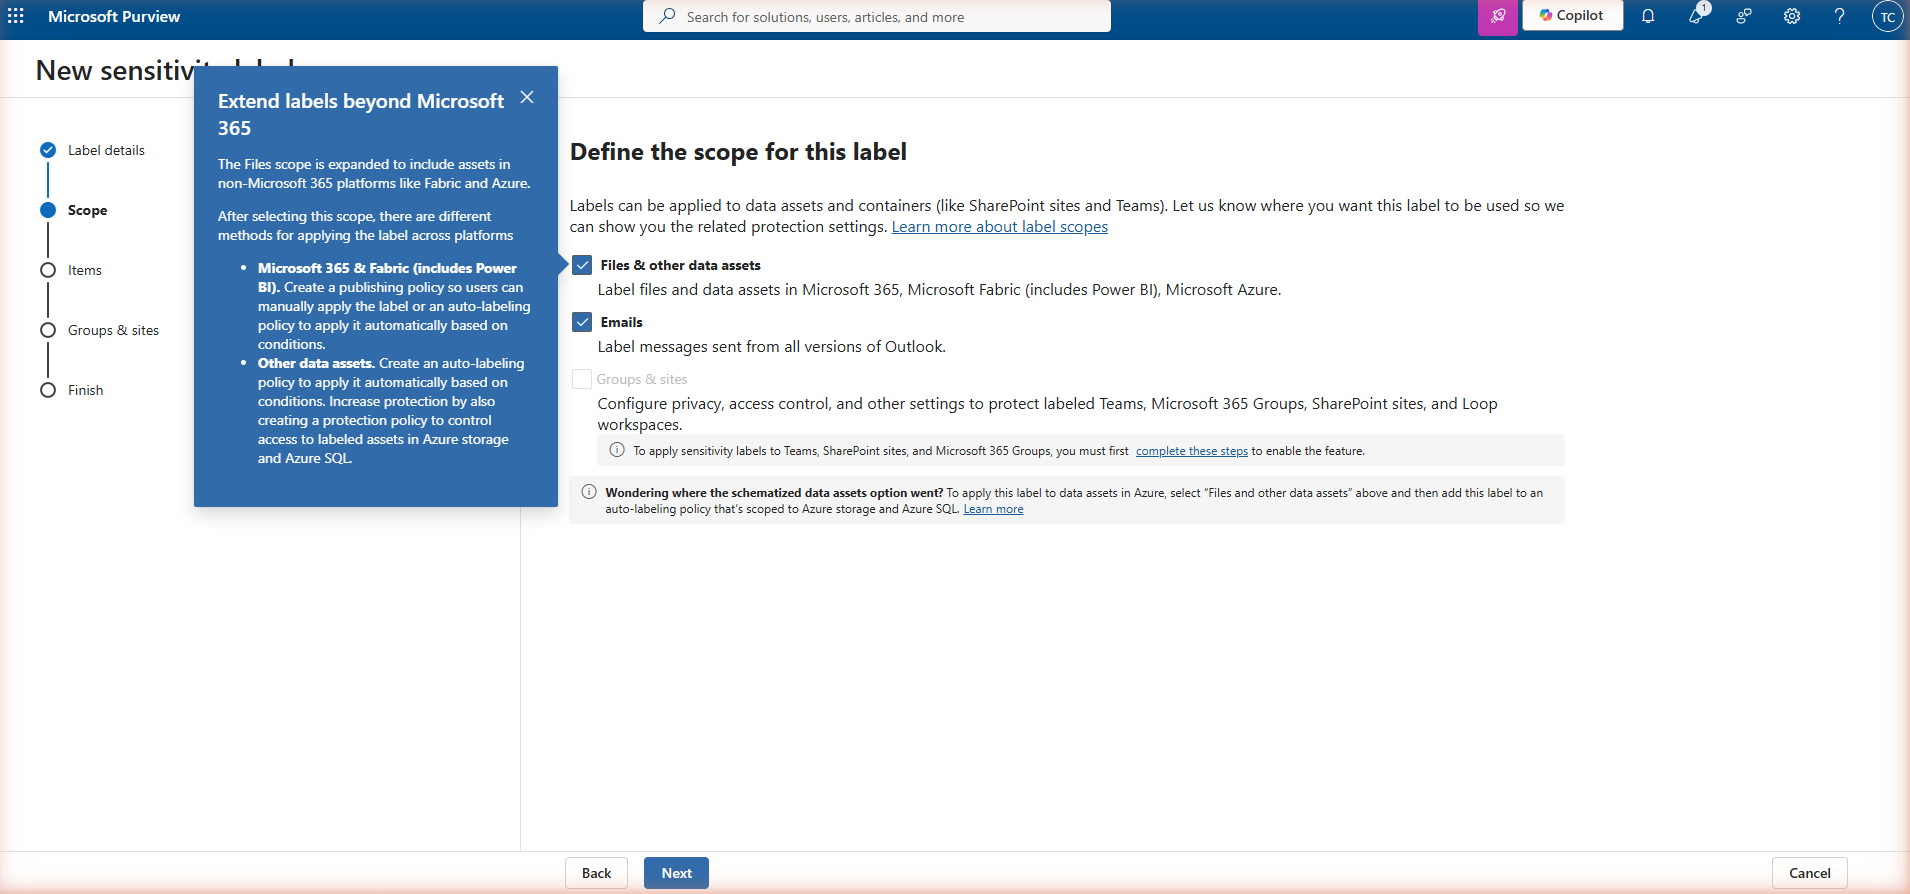
Checking Control access advances to the Access control sub-step, where you configure how encryption is applied.
Access control settings
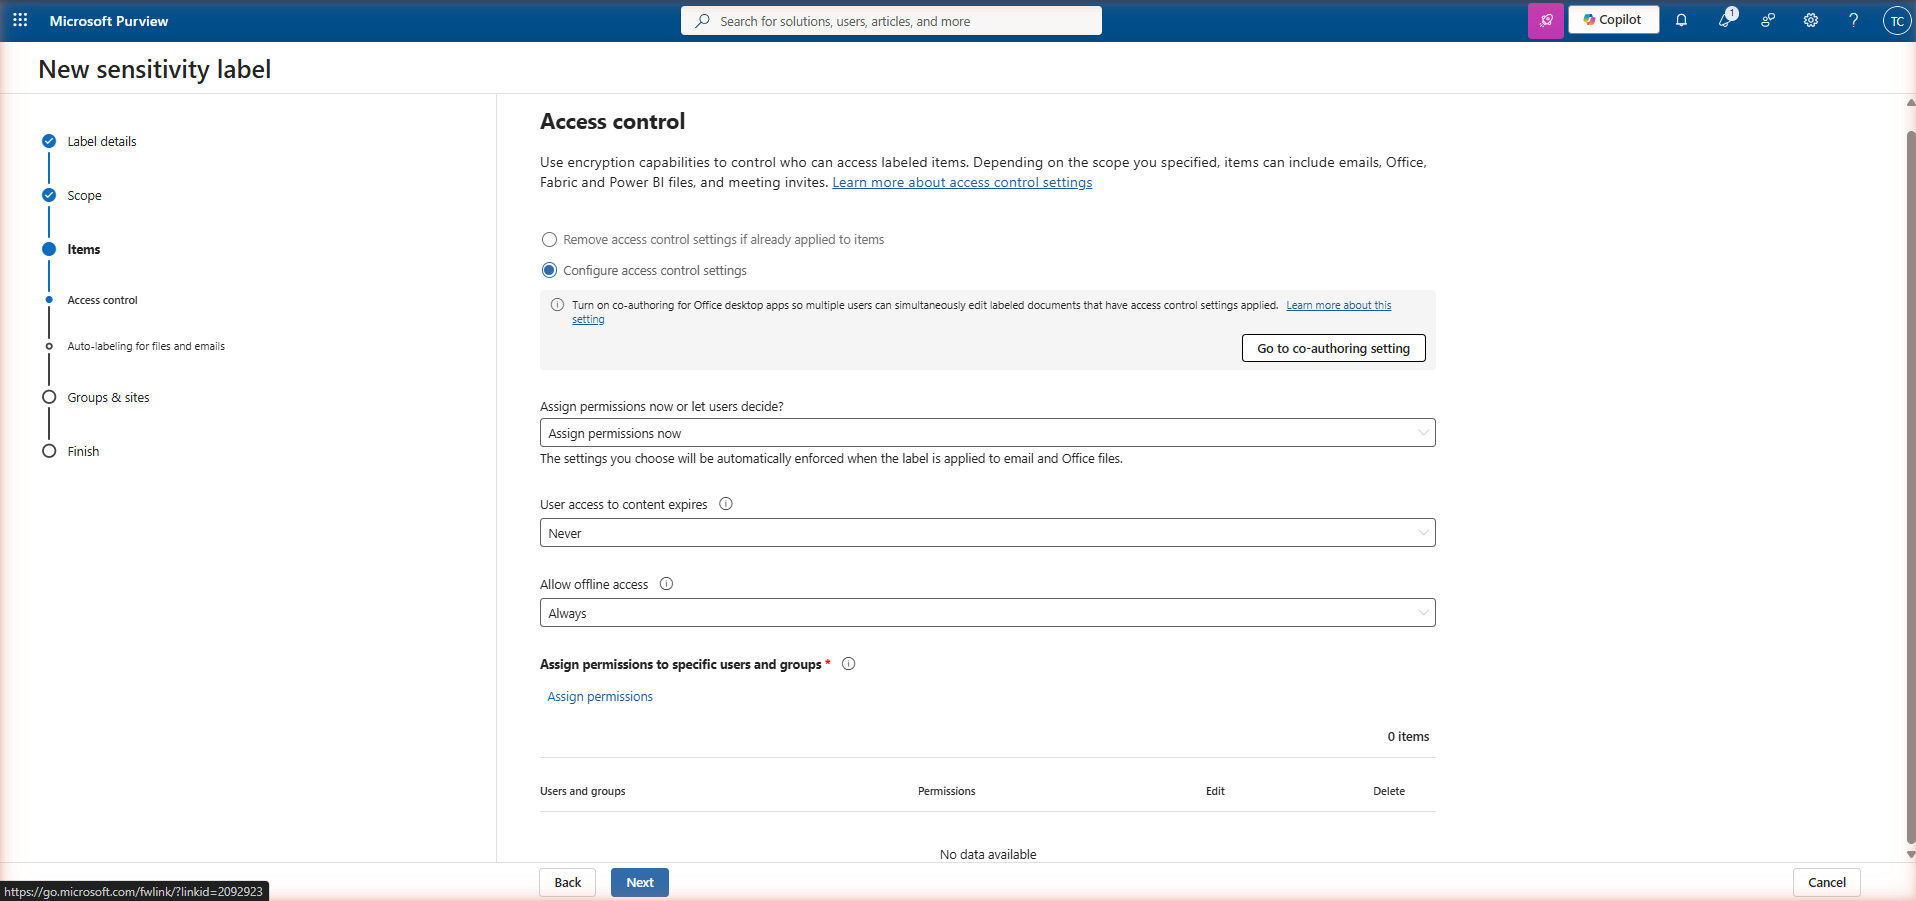
The three key settings here are:
Choose Assign permissions now for a consistent, admin-controlled policy (recommended for most scenarios). Choose Let users assign permissions if the label is designed for users to encrypt individual emails or documents with a custom recipient list — common for a "Do Not Forward" or personal-encryption label.
Set to Never for most labels. Use a date-based expiry for labels on time-sensitive content — for example, a label on board meeting materials that should become inaccessible after 90 days. Note that expiry requires the Azure Rights Management service to be reachable when the file is opened.
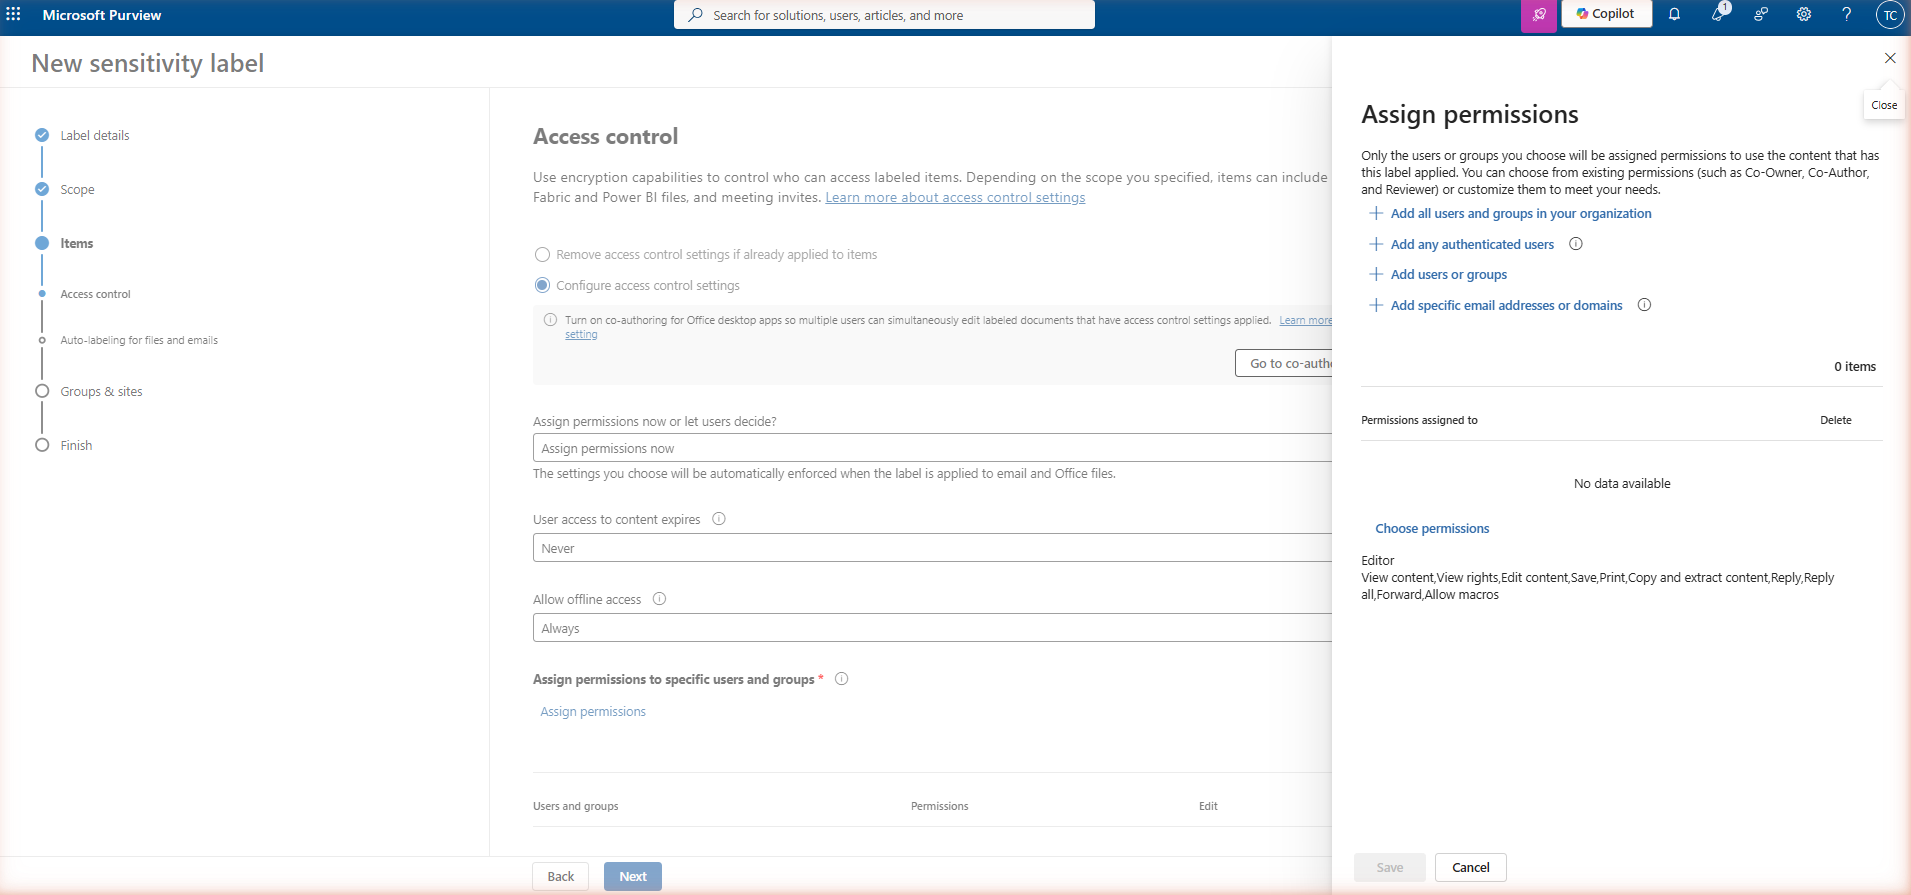
Click Assign permissions to open the permissions panel. You can add All users and groups in your organisation (equivalent to all internal users), Any authenticated user (any Azure AD account globally), specific groups, or individual email addresses. Set the appropriate permission level — Co-Owner, Co-Author, Reviewer, Viewer, or custom.
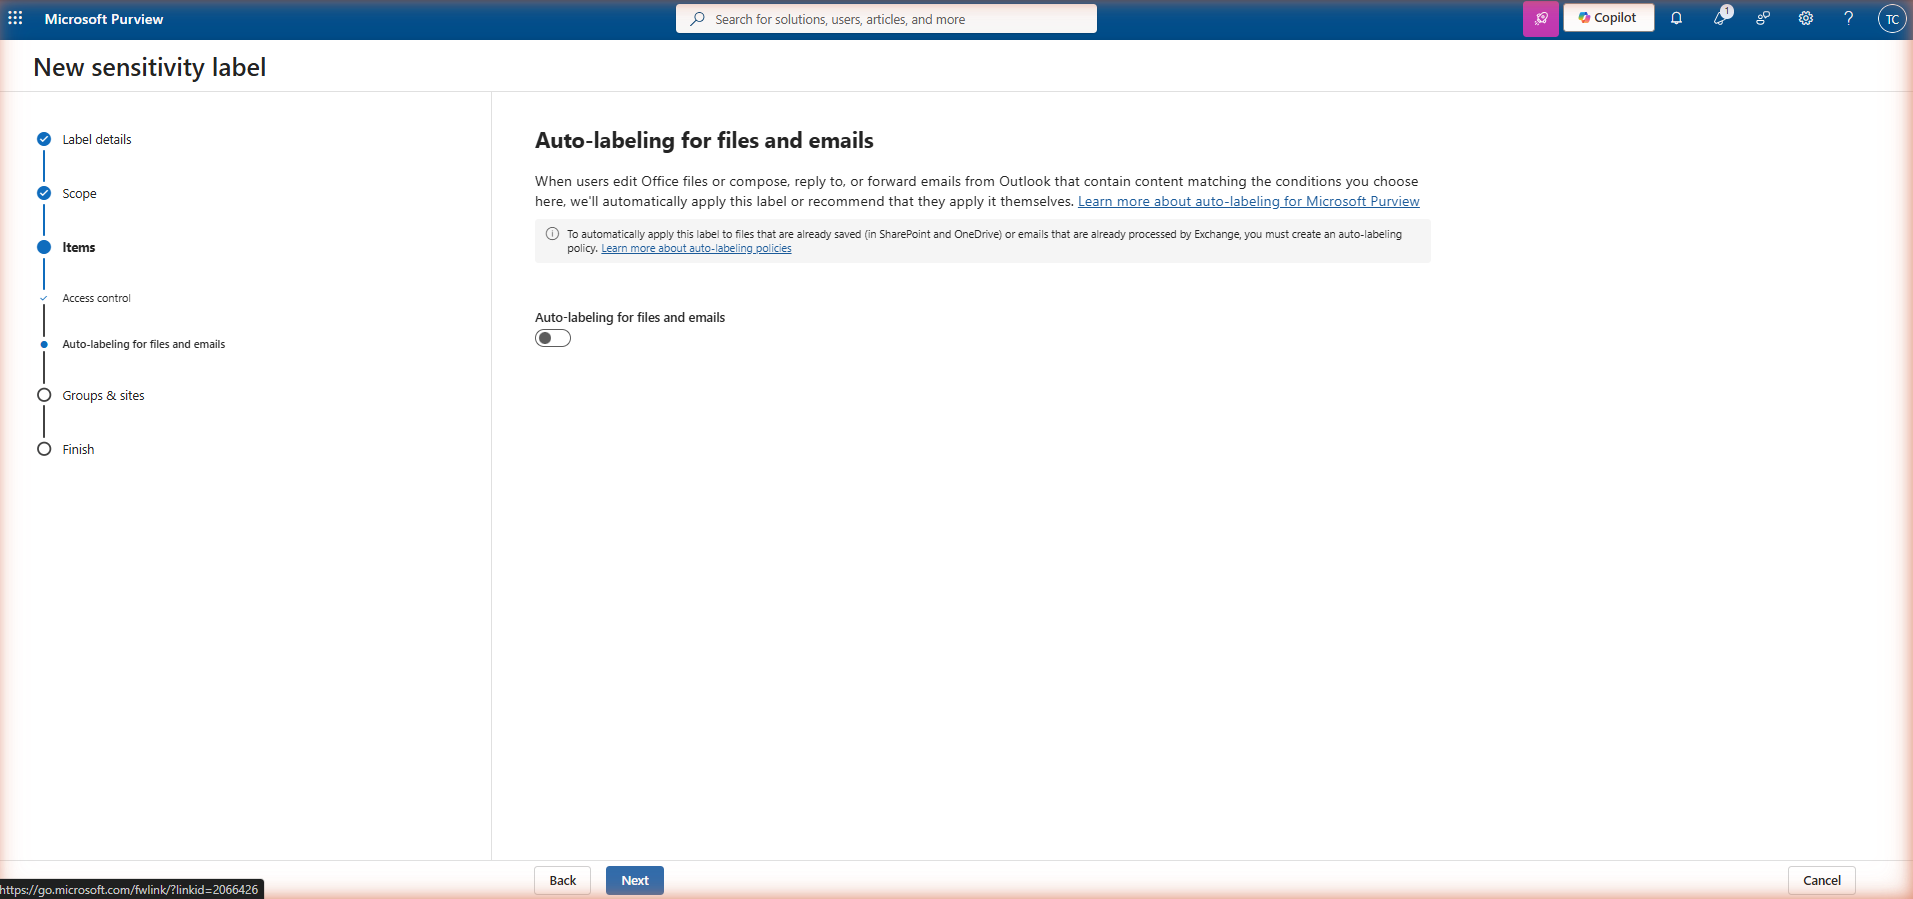
Auto-labeling for files and emails
After access control, the wizard shows the Auto-labeling sub-step. This toggle is off by default.
Step 4 — Groups & sites
If you enabled the Groups & sites scope, this step allows you to define what happens at the container level when the label is applied to a Team, SharePoint site, or Microsoft 365 Group.
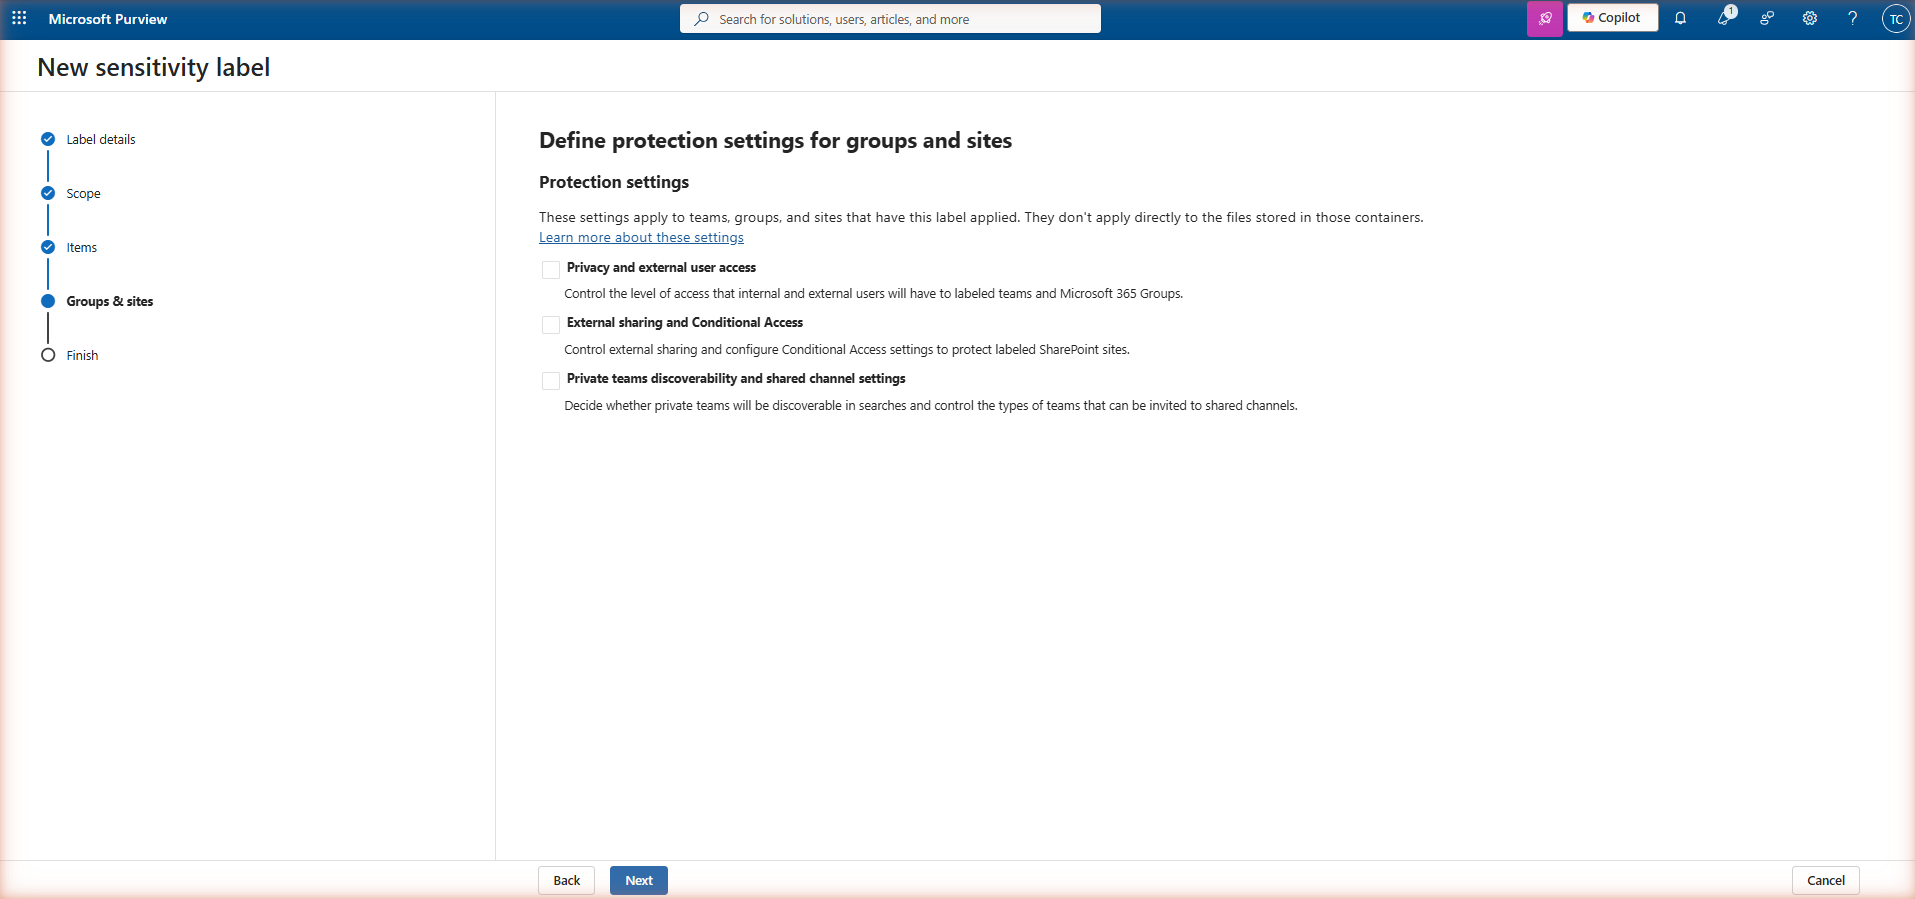
| Setting | What it controls | Typical use |
|---|---|---|
| Privacy and external user access | Whether a labelled Team or Group is Public or Private; whether guest access is allowed | Set to Private + block guest access for a "Confidential" label applied to a finance team |
| External sharing and Conditional Access | SharePoint site-level sharing controls; whether Conditional Access policies apply when accessing the site | Restrict external sharing to only existing guests, require managed devices via Conditional Access |
| Private teams discoverability and shared channel settings | Whether a private team is discoverable in search; what types of teams can be invited to shared channels | Hide highly sensitive teams from tenant-wide search results |
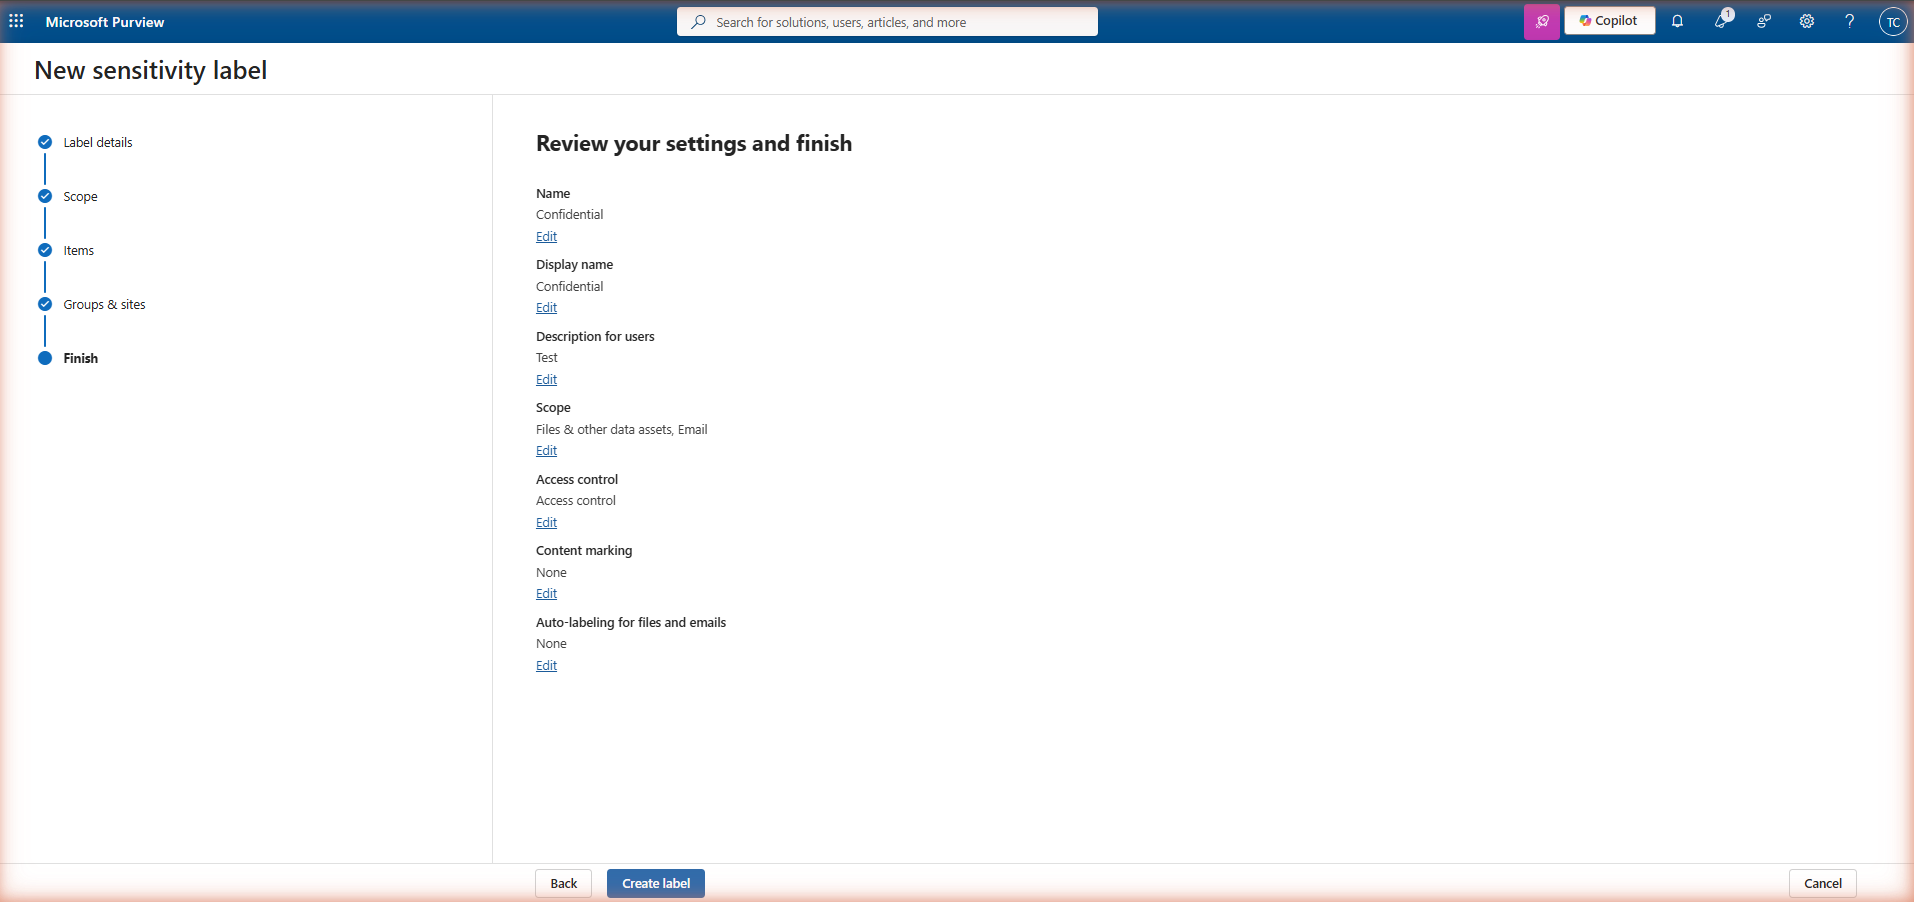
After Groups & sites, the wizard shows a Review your settings and finish summary before you create the label.
Publishing with a label policy
A label that has been created but not published is invisible to end users. To make labels available in Office apps, Outlook, and Teams, you must create a label publishing policy.
Navigate to Information Protection → Policies → Label publishing policies. A fresh tenant will show no policies — the page confirms labels are available to publish but none have been deployed yet.
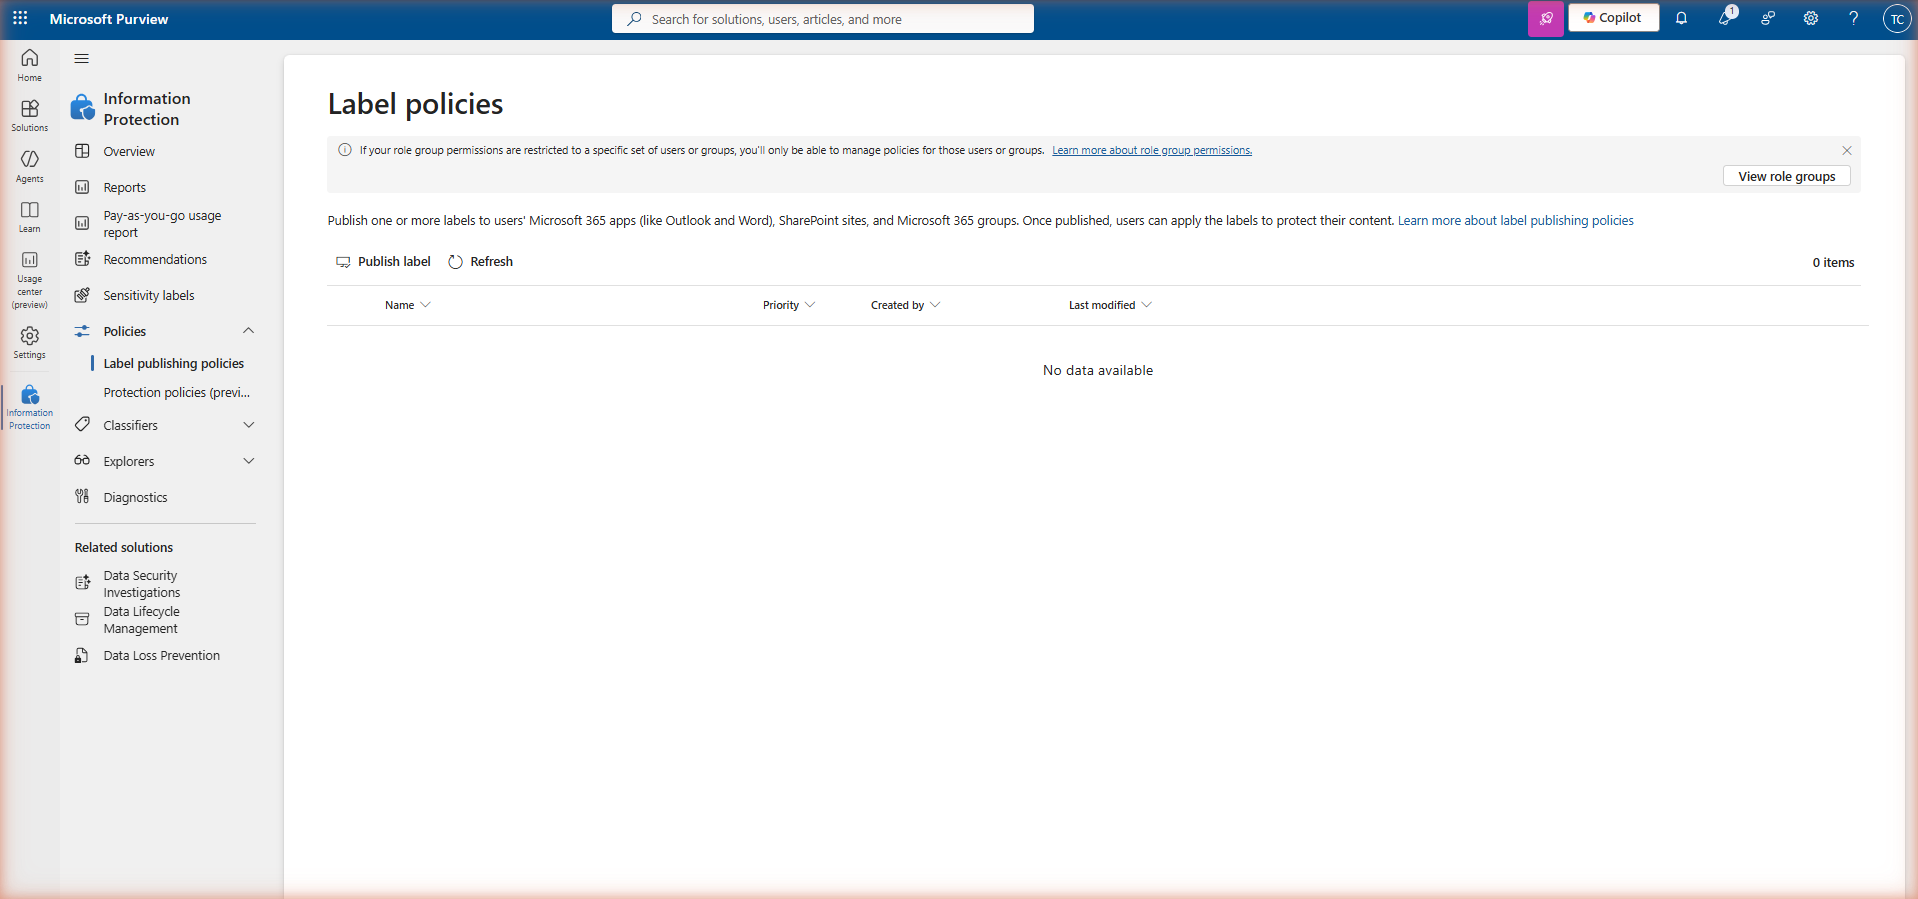
Click Publish label and complete the publishing wizard. The key decisions are:
Select one or more labels from the list. You can publish all labels in a single policy for simplicity, or create separate policies — for example, a policy that publishes all labels to the entire organisation and a separate policy that includes a "Highly Confidential" label available only to the security team.
Target the policy at All users and groups for a tenant-wide deployment, or select specific security groups to stage a pilot rollout. This is a common approach: publish a basic label set broadly, then publish a stricter label set (with mandatory labelling enabled) to a pilot group first.
Configure default labels (optional), whether users must justify downgrading or removing a label, and whether labelling is mandatory. For Copilot readiness, consider configuring a default label — available at the policy level for Office apps and, separately, at the document library level in SharePoint for certain scenarios. This ensures content is classified at creation rather than relying on users to remember, but the right scope depends on your configuration: policy-level defaults apply across Office apps, while library-level defaults in SharePoint apply to specific libraries where you have enabled this feature.
After saving a label policy, allow time for the policy to propagate to users' apps. Microsoft's documentation notes that policy changes can take time to reach all clients — avoid scheduling user training immediately after publishing. For details, see Create and configure sensitivity labels and their policies.
Recommended label taxonomy for most organisations
A common mistake is creating too many labels. If users face too many choices, they will pick the lowest-sensitivity label by default. A four-label taxonomy covers most SMB and mid-market scenarios.
| Label name | Intended use | Access control? | Copilot behaviour |
|---|---|---|---|
| Public | Content approved for external distribution — press releases, public documentation | No encryption | Copilot can summarise and surface freely |
| Internal | Default label for day-to-day business content not intended for external parties | No encryption (visual marking only) | Copilot surfaces to all internal users |
| Confidential | Business-sensitive content — finance, HR, contracts, strategic plans | Encryption — intended audience (all internal users in some organisations, but often a narrower group for genuinely sensitive content), Co-Author | Copilot surfaces only to users with decryption rights |
| Highly Confidential | Restricted information — board materials, personal data, M&A | Encryption — named groups only (e.g. Finance, Legal, Executives) | Copilot cannot surface to users outside the permitted group |
Pre-deployment checklist
-
Enable sensitivity labels for SharePoint and OneDrive Click "Turn on now" from the Sensitivity labels overview page in Microsoft Purview. Required for SharePoint and OneDrive to process encrypted Office files with sensitivity labels — without this, key scenarios such as Office for the web, search, DLP, eDiscovery and co-authoring will not work as expected. The file remains protected, but the service cannot handle it the way you need. Docs ↗
-
Enable sensitivity labels for Teams, Groups, and SharePoint sites Separate from the above — required if you want to apply container-level labels to Teams and SharePoint sites. Follow the prerequisite steps shown in the Scope wizard step. Docs ↗
-
Enable co-authoring for encrypted files Required if you plan to use access control (encryption) on labels applied to files in OneDrive and SharePoint. Without this, co-editing in Office desktop apps will fail. Docs ↗
-
Design your label taxonomy before creating labels Agree on label names, descriptions, and access control scope with your security and compliance team before building in Purview. Renaming or restructuring labels after deployment is disruptive to end users and active files.
-
Create all labels before publishing any policy Build the full label set first so you can publish all labels in a single well-structured policy. Publishing partial sets and amending them later can create inconsistencies across users' apps.
-
Publish to a pilot group first Target the label publishing policy at a test security group before rolling out to the full organisation. Verify that labels appear correctly in Word, Outlook, and Teams, and that encrypted files can be co-edited as expected.
-
Allow propagation time after publishing After publishing a label policy, allow time for changes to reach all users' apps before scheduling user communications or training. Check the Microsoft 365 admin centre for policy status.
-
Plan service-side auto-labeling for existing content (E5 feature) Client-side auto-labeling (configured in the label wizard) only triggers when users are actively editing files. To classify files already stored in SharePoint and OneDrive at scale, configure a separate auto-labeling policy — this requires Microsoft 365 E5 Compliance or an equivalent add-on licence.