Microsoft Teams Meeting Policies: A Complete Configuration Guide for IT Administrators
Introduction
In the modern hybrid workplace, Microsoft Teams is the central hub for collaboration, communication, and, most importantly, meetings. As an IT administrator, ensuring that these meetings are secure, compliant, and productive is a top priority. This is where Teams Meeting Policies become one of the most powerful tools in your arsenal. They allow you to granularly control the features and capabilities available to users before, during, and after a meeting, transforming Teams from a simple communication tool into a governed and secure collaboration platform.
Meeting policies are not just about restricting features; they are about creating tailored experiences for different user groups and meeting types. Whether you need to lock down sensitive executive meetings, enable open collaboration for internal project teams, or define a secure environment for meetings with external partners, a well-defined policy strategy is the key. This guide will provide a comprehensive, step-by-step walkthrough for creating, configuring, and managing Teams Meeting Policies to enhance security, ensure compliance, and optimize the user experience across your organization.
Prerequisites
Before diving into the configuration, ensure you have the following in place:
- Licensing: A valid Microsoft Teams license (included in most Microsoft 365 Business and Enterprise plans).
- Permissions: You must be a member of the Teams Administrator or Global Administrator role in Microsoft 365 to access and manage meeting policies.
- PowerShell (Optional but Recommended): For advanced management and bulk operations, the MicrosoftTeams PowerShell module is required. You can install it with the following command:
Install-Module -Name MicrosoftTeams
Understanding Meeting Policies
At its core, a meeting policy is a collection of settings that control the features available to meeting organizers and participants. It is crucial to understand two key concepts: policy types and implementation types.
Global vs. Custom Policies
- Global (Org-wide default): This is the default policy that applies to every user in your organization from the moment they are created. You can edit the Global policy, but you cannot delete it. It serves as the baseline for your entire tenant.
- Custom Policies: These are policies you create to tailor experiences for specific users or groups. A custom policy will always override the Global policy. For example, you could create a "Restricted" policy for contractors and an "Executive" policy for C-level users.
Per-Organizer vs. Per-User Implementation
Meeting policy settings are applied in one of two ways, which determines who is affected by the setting.
| Implementation Type | Description |
|---|---|
| Per-Organizer |
The setting is applied based on the policy assigned to the
meeting organizer
. All participants in the meeting, including external ones, inherit the organizer's policy for that setting.
Example:
Who can bypass the lobby
.
|
| Per-User | The setting is applied to a specific user , regardless of who organized the meeting. This controls features that are personal to the user. Example: The ability to turn on transcription or recording. |
Understanding this distinction is critical for predicting and troubleshooting meeting behavior.
Step-by-Step Configuration Guide
This guide will walk you through creating and assigning a custom meeting policy from the Teams admin center.
Step 1: Access the Teams Admin Center
First, navigate to the Microsoft Teams admin center, which is the central hub for all Teams administration.
- Open your browser and go to: https://admin.teams.microsoft.com
- Sign in with your administrator credentials.
Step 2: Navigate to Meeting Policies

Screenshot 1: The Teams admin center showing the Meeting policies page.
- In the left-hand navigation pane, expand Meetings .
- Click on Meeting policies .
- Here, you will see a list of all available policies, including the Global (Org-wide default) policy.
Step 3: Create a Custom Meeting Policy
While you can edit the Global policy, the best practice is to create custom policies for different roles. Let's create a policy for "Internal Project Leads" who require more advanced features.
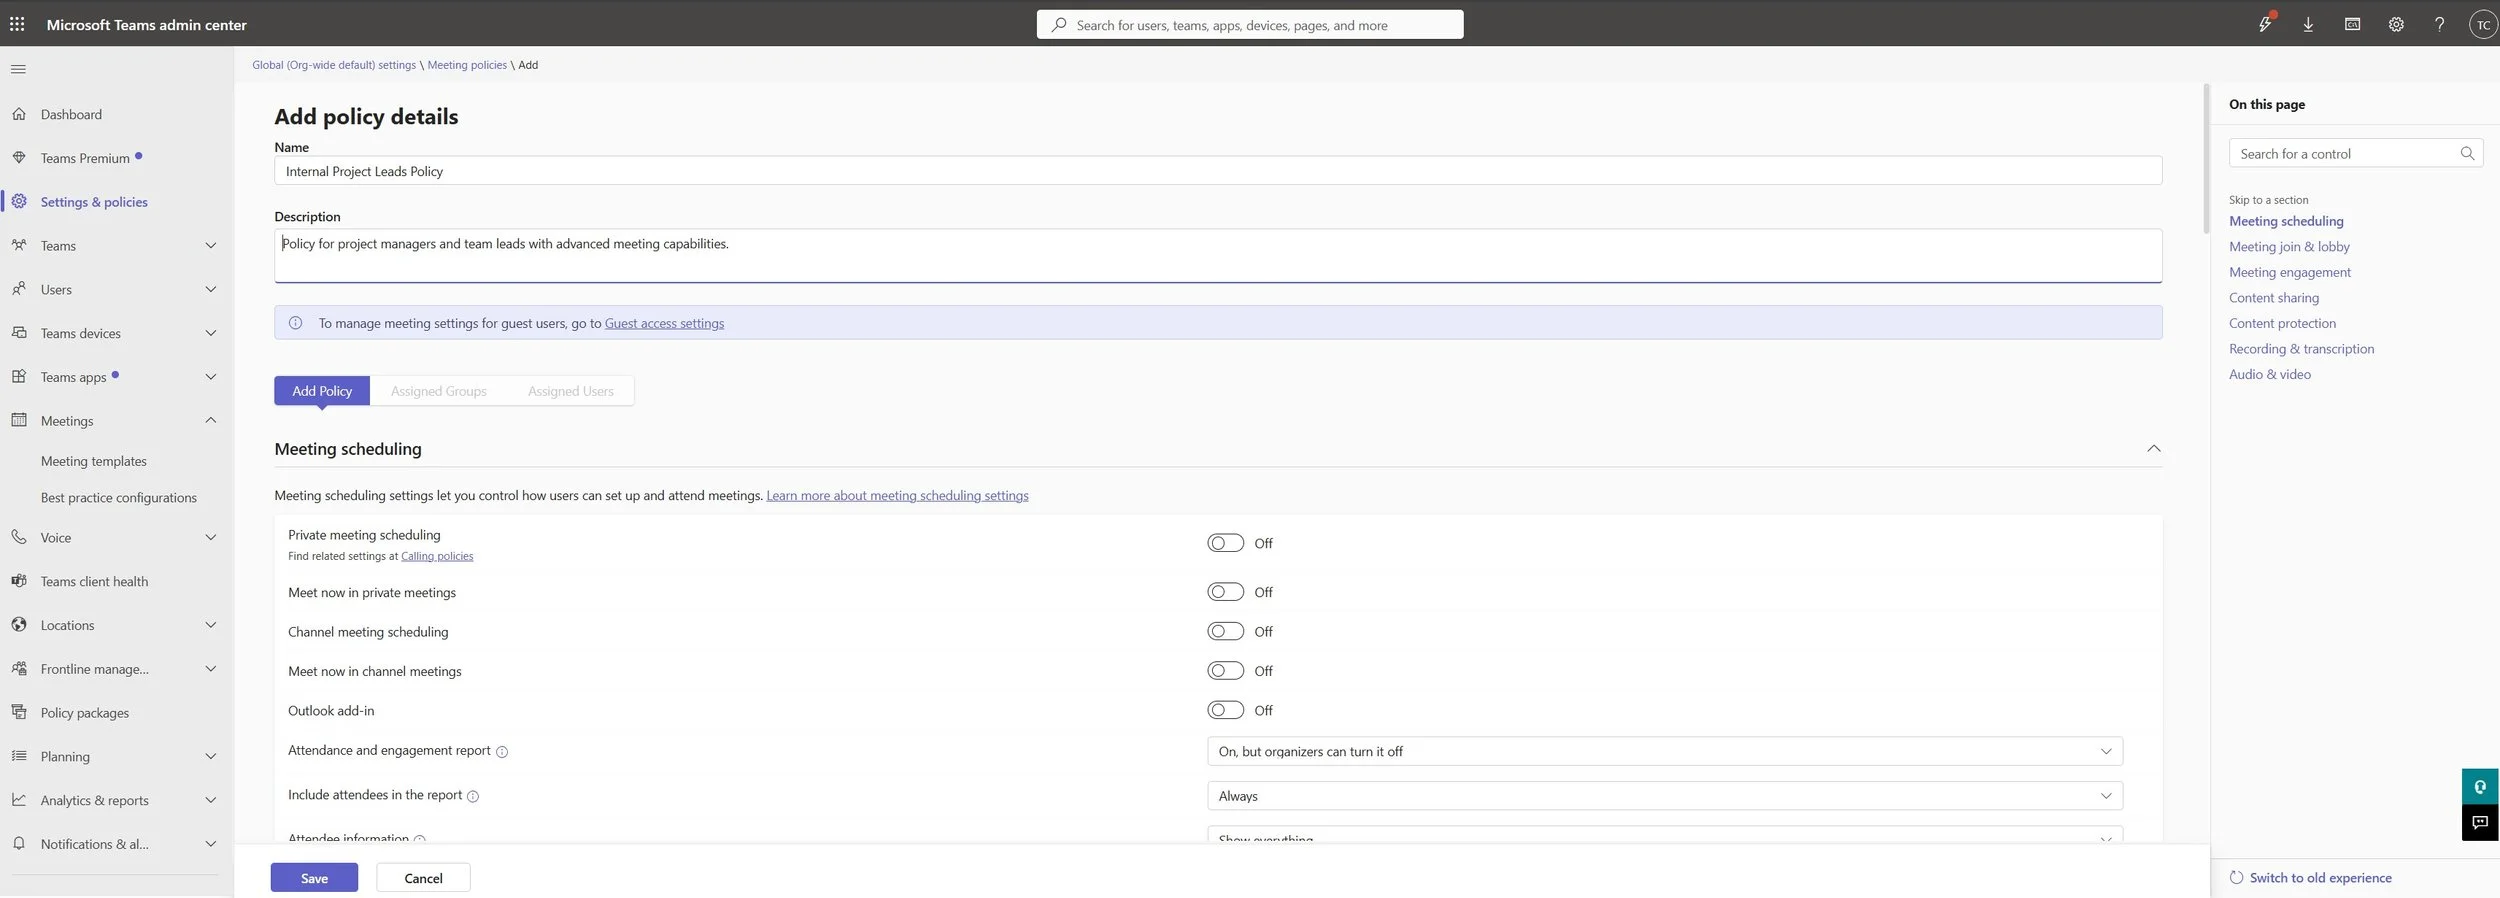
Screenshot 2: Creating a new custom meeting policy with a descriptive name.
- Click the + Add button.
-
Name:
Enter a descriptive name, for example,
Internal Project Leads Policy. -
Description:
Provide a brief summary, such as
Policy for project managers and team leads with advanced meeting capabilities.
Step 4: Configure Key Policy Settings
This is the most critical step. Below are some of the most important settings to configure, organized by section.

Screenshot 3: Configuring the Meeting join & lobby settings for enhanced security.
Meeting join & lobby
This section controls who can join meetings directly and who must wait in the lobby to be admitted.
-
Who can bypass the lobby:
Set to
People in my org and guests. This is a secure default that forces external and anonymous users to wait. -
People dialing in can bypass the lobby:
Set to
Off. This prevents unauthenticated callers from joining directly. -
Anonymous users can join a meeting:
Set to
Offfor internal meetings to enhance security.
Content sharing
This controls what users can present and how they can collaborate.
-
Screen sharing mode:
Set to
Entire screen. You can restrict this to aSingle applicationif needed for security. -
Who can present:
Set to
People in my org and guests. This prevents external anonymous users from taking control and presenting. -
Whiteboard:
Ensure this is
Onfor collaborative sessions.
Recording & transcription
This controls who can record meetings and use transcription services.
-
Meeting recording:
Set to
Onfor project leads who need to document meetings. You can also set an expiration time for recordings. -
Transcription:
Set to
Onto allow live transcription, which is excellent for accessibility and record-keeping.
Meeting engagement
This controls interactive features within the meeting.
-
Meeting chat:
Set to
On for everyone. You can restrict it toIn-meeting onlyto prevent post-meeting chats. -
Reactions:
Set to
Onto allow non-disruptive feedback.
After configuring all desired settings, click Save .
Step 5: Assign the Policy to Users
Once the policy is created, you must assign it to the relevant users.

Screenshot 4: Assigning the custom meeting policy to specific users.
-
From the
Meeting policies
page, select the policy you just created (
Internal Project Leads Policy). - Click on Assign users .
- Search for the users by name or email address, select them, and click Add .
- Click Apply to confirm the assignment.
Policy Propagation Time
Be aware that it can take several hours (sometimes up to 24) for policy changes to fully propagate to users. If a user does not see the changes immediately, advise them to sign out and sign back into Teams.
PowerShell Management
For managing policies at scale, PowerShell is indispensable. It allows you to create, modify, and assign policies far more efficiently than the GUI.

Screenshot 5: Using PowerShell to retrieve all Teams meeting policies.
Connect to Teams PowerShell
First, open PowerShell as an administrator and run:
# Install the module if you haven't already
# Install-Module -Name MicrosoftTeams

# Connect with your admin credentials
Connect-MicrosoftTeams
Useful PowerShell Cmdlets
-
Get all meeting policies:
powershell Get-CsTeamsMeetingPolicy -
Create a new meeting policy:
powershell New-CsTeamsMeetingPolicy -Identity "Executive Meeting Policy" -AutoAdmittedUsers "EveryoneInCompany" -AllowMeetNow $true -AllowTranscription $true -
Assign a policy to a user:
       powershell
    Grant-CsTeamsMeetingPolicy -Identity "Tiago.Carvalho@tiagoscarvalho.com" -PolicyName "Executive Meeting Policy"
Best Practices for Policy Management
- Principle of Least Privilege: Start with a restrictive Global policy and create custom policies that grant additional permissions, rather than the other way around.
- Create Role-Based Policies: Avoid assigning policies directly to users. Instead, create policies for roles (e.g., "External Users," "Standard Internal," "Executives") and assign users to those roles.
- Regularly Audit Policies: Review your policies quarterly or semi-annually to ensure they are still relevant and aligned with your organization's security posture.
-
Use Descriptive Naming:
Give your policies clear, descriptive names (e.g.,
Marketing - External Webinars,IT - Secure Admin Meetings) to make management easier.
Quick Troubleshooting
| Symptom | Possible Cause | Solution |
|---|---|---|
| A user's policy hasn't updated. | Policy propagation delay. |
Wait up to 24 hours. Ask the user to sign out and sign back into Teams. Use
Get-CsOnlineUser -Identity "user" | fl TeamsMeetingPolicy
in PowerShell to verify the assigned policy.
|
| A user cannot record a meeting. |
The
AllowCloudRecording
setting in their assigned policy is set to
false
.
|
Check the user's assigned meeting policy and ensure the recording setting is enabled. |
| External users are joining meetings directly without waiting in the lobby. |
The meeting organizer's policy has
Who can bypass the lobby
set to
Everyone
.
|
Modify the organizer's policy to a more restrictive setting, such as
People in my org and guests
.
|
Conclusion
Microsoft Teams Meeting Policies are a fundamental component of a well-governed and secure Microsoft 365 environment. By moving beyond the default settings and creating a structured, role-based policy strategy, IT administrators can empower users with the tools they need to be productive while simultaneously protecting the organization from security risks and ensuring compliance. Take the time to plan and implement your policies thoughtfully—it is an investment that will pay dividends in security, efficiency, and user satisfaction.