How to Configure Data Loss Prevention (DLP) for Small Businesses: A Step-by-Step Guide
Short Summary: A complete, step-by-step guide for IT administrators on how to implement Microsoft Purview Data Loss Prevention (DLP) for small and medium-sized businesses. Learn to protect sensitive data like credit card numbers, meet GDPR compliance requirements, and deploy DLP policies using a phased approach that minimizes disruption and maximizes protection.
Introduction: Why Data Loss Prevention is a Must-Have for Your Small Business
In today's digital economy, data is the lifeblood of any organization, regardless of its size. For small and medium-sized businesses (SMBs), protecting sensitive information is not just a matter of good practice—it's a legal and financial necessity. Regulations like the General Data Protection Regulation (GDPR) in Europe impose heavy fines for data breaches, and losing customer trust can be even more costly. This is where Microsoft Purview Data Loss Prevention (DLP) comes in.
A DLP policy is an automated security guard that identifies, monitors, and protects sensitive information across your Microsoft 365 environment, including Exchange Online, SharePoint, OneDrive, and Teams. It helps prevent the accidental or intentional oversharing of critical data, such as credit card numbers, personal identification numbers (like NIF or Social Security), or confidential client information.
This step-by-step guide will walk you through configuring your first DLP policy, tailored specifically for the needs and budget of a small business, using a practical, phased approach that minimizes disruption and maximizes protection.
Key Takeaway: DLP is no longer an enterprise-only luxury. With Microsoft 365 Business Premium, it's an accessible and essential tool for any SMB looking to secure its data and meet compliance requirements.
Prerequisites: Licensing for DLP
Before we begin, it's crucial to understand the licensing requirements. Data Loss Prevention is a feature of Microsoft Purview. To use it, you need one of the following subscriptions:
- Microsoft 365 Business Premium
- Microsoft 365 E3/E5
- Office 365 E3/E5
For most small businesses, Microsoft 365 Business Premium is the most cost-effective and comprehensive option, providing a robust security foundation that includes DLP capabilities.
The 4-Phase Strategy: Deploying DLP Without Breaking Your Business
Deploying a new security policy can be daunting. If not done correctly, it can block legitimate business processes and frustrate users. To avoid this, we will follow Microsoft's recommended four-phase incremental rollout strategy. This ensures a smooth, controlled deployment.
| Phase | State | Goal | User Impact |
|---|---|---|---|
| 1. Simulation | Run in simulation mode | Test the policy silently and gather data on potential matches. | None. The policy runs in the background without blocking anything. |
| 2. Simulation with Tips | Run in simulation mode and show policy tips | Educate users by showing them non-intrusive policy tips when a potential violation occurs. | Low. Users see tips but are not blocked. This raises awareness. |
| 3. Enforcement with Override | Turn it on | Block the action but allow users to override the block with a business justification. | Medium. Users are blocked but can proceed if necessary. This helps identify false positives. |
| 4. Full Enforcement | Turn it on | Block the action without an option to override. | High. The policy is fully active and enforces the rules strictly. |
This phased approach allows you to test, tune, and train users before fully enforcing the rules, guaranteeing a successful and frustration-free implementation.
Step-by-Step Guide: Creating Your First DLP Policy
Let's create a practical DLP policy to protect a common type of sensitive data for SMBs: financial information, specifically credit card numbers.
Step 1: Navigate to the Microsoft Purview Compliance Portal
First, you need to access the heart of Microsoft's compliance tools.
- Open your browser and go to the Microsoft Purview compliance portal.
- Sign in with an account that has Global Administrator or Compliance Administrator permissions.
- In the left-hand navigation pane, expand Data loss prevention and click on Policies.
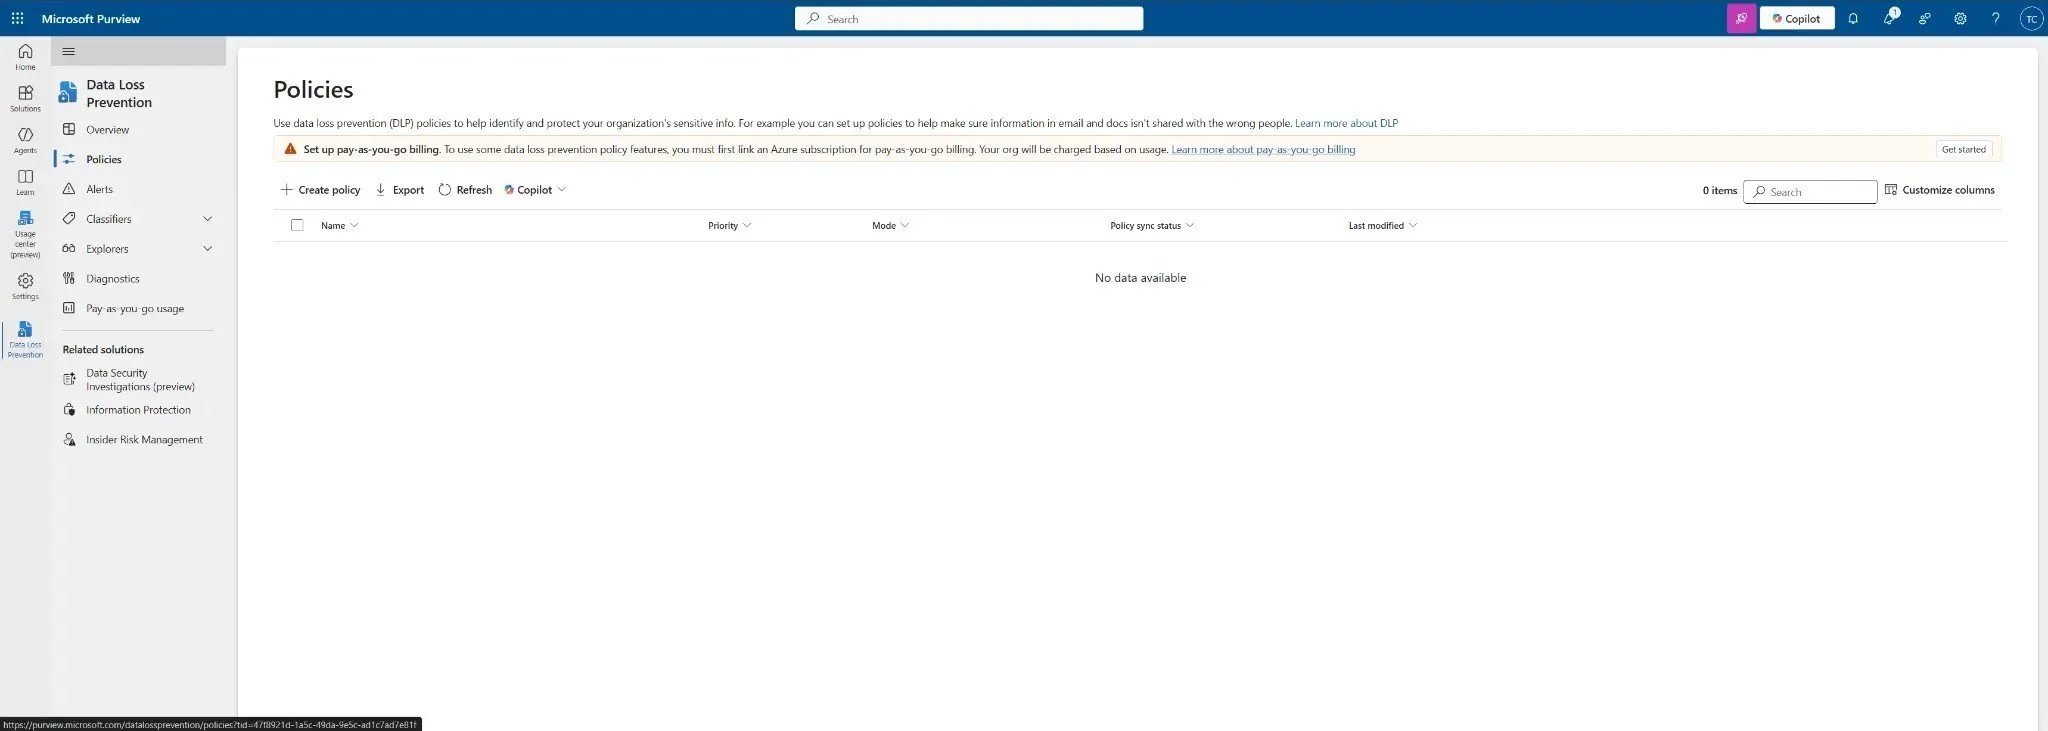
Figure 1: The Data Loss Prevention policies page in the Microsoft Purview compliance portal. Click "+ Create policy" to start.
Step 2: Choose a Policy Template
Microsoft provides pre-configured templates to get you started quickly.
- Click the + Create policy button.
- In the "Start with a template or create a custom policy" wizard, select the Financial category.
- Choose the PCI Data Security Standard (PCI DSS) template. This template includes credit card numbers and other financial data types.
- Click Next.

Figure 2: Selecting the PCI Data Security Standard template. The "Financial" category is ideal for protecting credit card numbers.
Step 3: Name Your Policy and Assign Admin Units
Give your policy a clear, descriptive name.
- Name:
DLP - Block External Sharing of Credit Card Numbers - Description:
This policy prevents the sharing of credit card numbers with recipients outside the organization. - Leave Administrative units as the default (Full directory) unless you have a specific need to scope it.
- Click Next.
Step 4: Define Policy Locations
Choose where the DLP policy will be active. For maximum protection, it's best to enable it across all core Microsoft 365 services.
- Keep the default selections to apply the policy to:
- Exchange email messages
- SharePoint sites
- OneDrive accounts
- Teams chat and channel messages
- You can choose to scope this to specific users or groups, but for a foundational policy, applying it to All is recommended.
- Click Next.
Step 5: Customize the Policy Rules (The Core of DLP)
This is where you define what the policy looks for and what it does.
- The template will have pre-configured rules. Click on the rule to Edit rule.
- Under Conditions, ensure Content contains is selected and that it includes Sensitive info types like "Credit Card Number".
- The most important condition is Content is shared from Microsoft 365 with people outside my organization. This ensures you are only targeting external sharing, minimizing internal disruption.
- Under Actions, select Restrict access or encrypt the content in Microsoft 365 locations.
- Check the box for Block users from sharing and restrict access to shared content and select Block everyone.
- Under User notifications, enable notifications and customize the policy tip to inform users why their action was blocked. This is crucial for user education.
- Click Save and then Next.
Step 6: Set the Policy Mode (Start with Simulation!)
As per our 4-phase strategy, we will start in test mode.
- Select the option Run the policy in simulation mode.
- This allows you to see what the policy would have done without actually blocking any users.
- Click Next.
Step 7: Review and Create
Review all your settings on the final screen. If everything looks correct, click Submit to create the policy.
It may take a few moments for the policy to be created and propagated across your tenant.
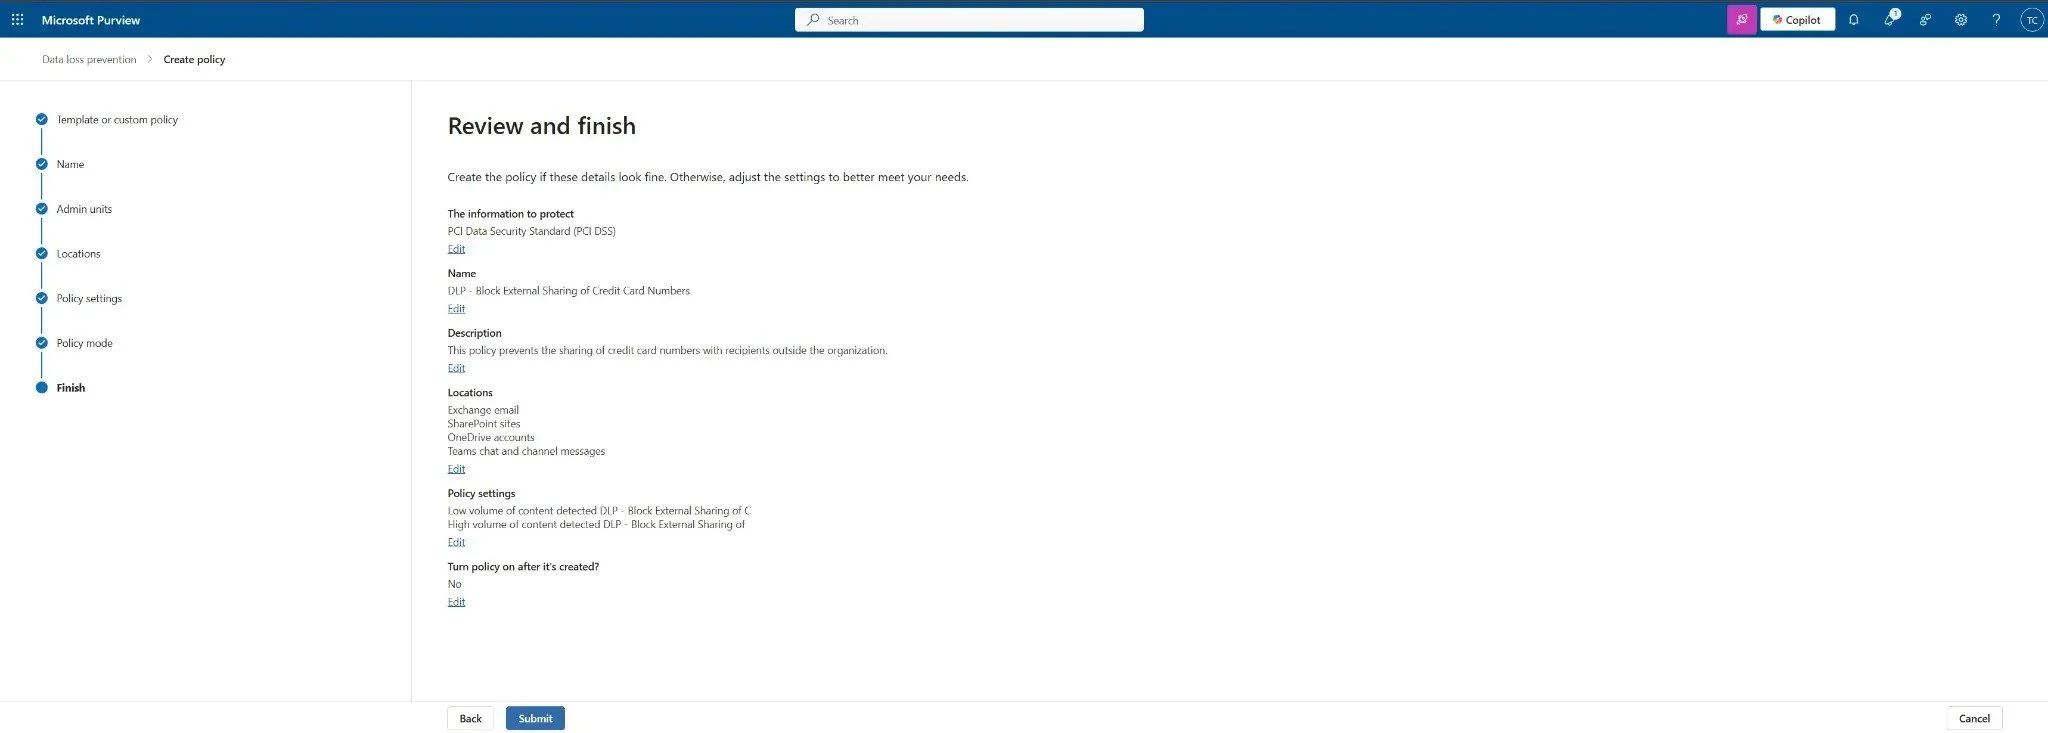
Figure 3: The final review page showing the policy configuration before submission.
Next Steps: Monitoring and Phased Rollout
Your policy is now running silently. Here's what to do next:
- Monitor Simulation Results: After 24 hours, go back to the DLP section in the Purview portal. Check the Activity explorer and policy reports to see if any legitimate business processes were flagged. Tune the policy if you find false positives.
- Move to Phase 2 (Simulation with Tips): After a week of successful simulation, edit the policy and change its state to Run the policy in simulation mode and show policy tips. Inform your users that they may start seeing informational pop-ups.
- Move to Phase 3 (Enforcement with Override): Once your team is comfortable with the policy tips, edit the policy again, set it to Turn it on right away, and configure the action to Block with override. This is your safety net.
- Move to Phase 4 (Full Enforcement): After a period of monitoring the overrides, and once you are confident the policy is working as intended, edit the rule one last time to Block without an override option.
By following this careful, phased approach, you can implement powerful data protection with confidence, ensuring your small business is secure, compliant, and resilient.