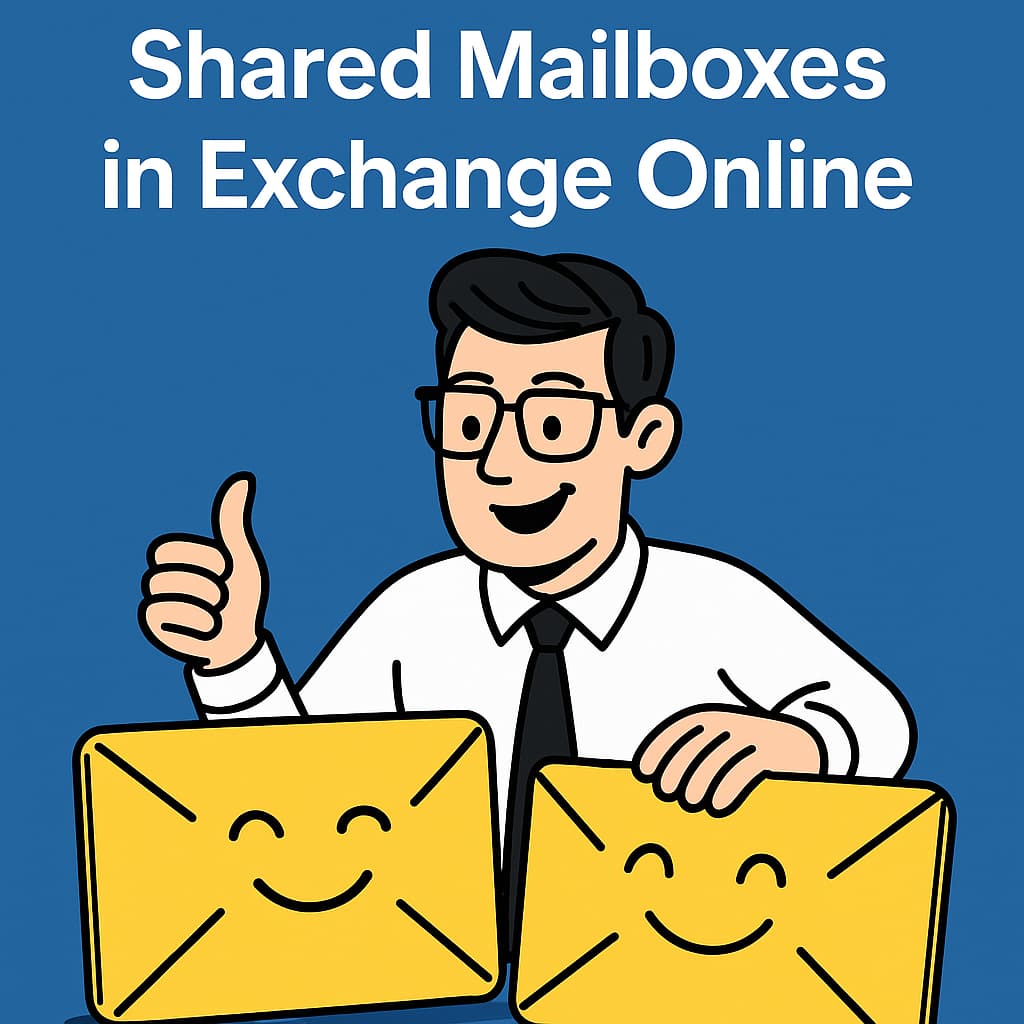
In any organization, seamless collaboration is the key to productivity. While Microsoft Teams and SharePoint are fantastic for real-time communication and document management, there's a classic hero that often gets overlooked: the shared mailbox. From support@tiagoscarvalho.com to info@tiagoscarvalho.com, shared mailboxes are the central hub for team-based email communication, allowing multiple users to monitor and respond to messages from a single, unified address.
However, a poorly configured shared mailbox can quickly descend into chaos, with missed emails, inconsistent replies, and a frustrating user experience. A well-structured shared mailbox, on the other hand, can streamline workflows, improve response times, and provide a professional image to your customers and partners.
This step-by-step guide will walk you through everything you need to know to master shared mailboxes in Exchange Online, from creation and configuration to permissions and best practices. We'll cover the three types of permissions, how to configure them using both the Exchange Admin Center (EAC) and PowerShell, and how to avoid common pitfalls.
Prerequisites
Before you begin, ensure you have the following:
- Exchange Online Plan: Part of Microsoft 365 Business Basic, Business Standard, Business Premium, or Enterprise plans
- Admin Permissions: Exchange Administrator or Global Administrator role
- PowerShell Module: Exchange Online Management module (for PowerShell commands)
💡 Licensing Considerations
Shared mailboxes do not require a license in most scenarios. However, a license is required if:
- The mailbox exceeds 50 GB in size
- You need to enable In-Place Archive
- You need to place the mailbox on Litigation Hold
- You want to allow direct sign-in (not recommended for security reasons)
For most organizations, shared mailboxes remain under 50 GB and do not require additional licensing costs.
The Three Pillars of Permissions
Understanding the three types of permissions is crucial for proper shared mailbox management. Each permission serves a distinct purpose:
| Permission Type | Description | Email Appearance | Use Case |
|---|---|---|---|
| Full Access | Allows user to open and read the mailbox | N/A (read-only) | When you want users to monitor and respond |
| Send As | Allows user to send email as the shared mailbox | From: sales@tiagoscarvalho.com |
When you want a unified sender identity |
| Send on Behalf | Allows user to send email on behalf of the mailbox | From: User on behalf of sales@tiagoscarvalho.com |
When you want transparency about the sender |
Step 1: Creating a Shared Mailbox
Creating a shared mailbox in the Exchange Admin Center is straightforward:
- Navigate to the Exchange Admin Center (admin.exchange.microsoft.com).
- Go to Recipients > Mailboxes.
- Click Add a shared mailbox.
- Fill in the required fields:
- Display Name: The name that will appear in the address book (e.g.,
Sales Team). - Email address: The email address of the shared mailbox (e.g.,
sales@tiagoscarvalho.com).
- Display Name: The name that will appear in the address book (e.g.,
- Click Create.
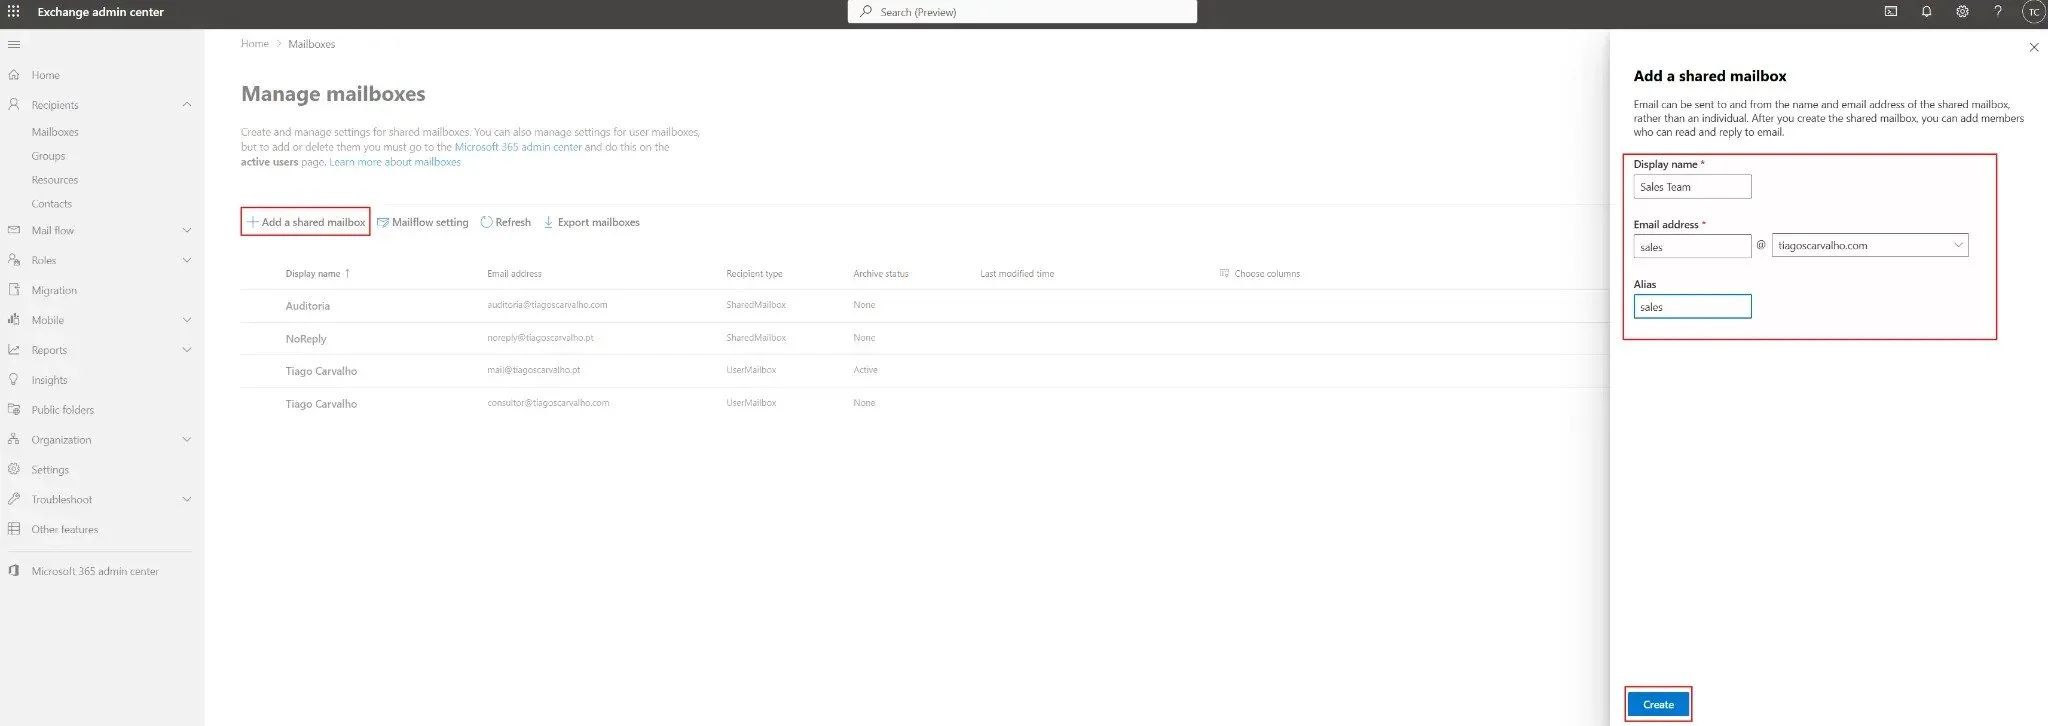
Figure 1: Creating a shared mailbox in the Exchange Admin Center
Step 2: Assigning Permissions
Once the shared mailbox is created, you need to assign permissions to users who will access it.
Using the Exchange Admin Center (EAC)
- In the Exchange Admin Center, navigate to Recipients > Mailboxes.
- Select the shared mailbox you just created.
- Click on the Delegation tab.
- Under Full Access, click Edit and add the users who need to read and manage the mailbox.
- Under Send As, click Edit and add the users who need to send emails as the shared mailbox.
- Under Send on Behalf, click Edit and add the users who need to send emails on behalf of the shared mailbox.
- Click Save.
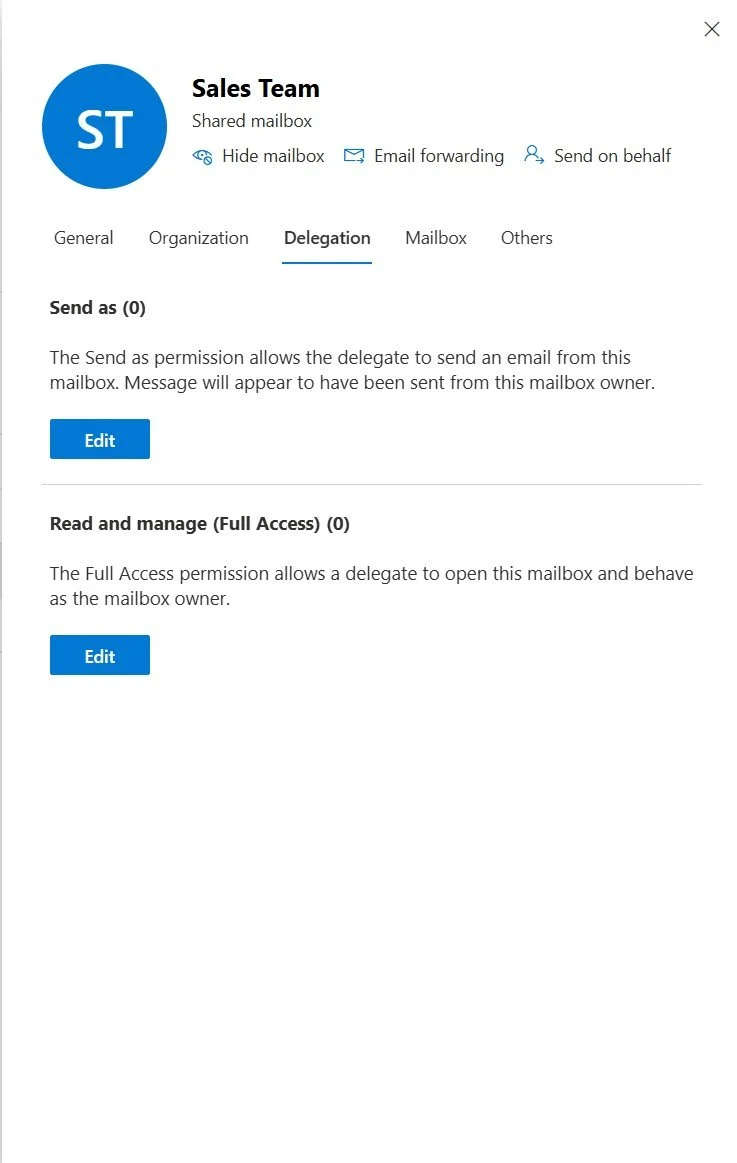
Figure 2: Configuring delegation permissions in the Exchange Admin Center
Using PowerShell
For bulk operations or automation, PowerShell is more efficient:
# Connect to Exchange Online
Connect-ExchangeOnline

# Grant Full Access to a user
Add-MailboxPermission -Identity "Sales Team" -User "Tiago.Carvalho" -AccessRights FullAccess

# Grant Send As to a user
Add-RecipientPermission -Identity "Sales Team" -Trustee "Tiago.Carvalho" -AccessRights SendAs

# Grant Send on Behalf to a user
Set-Mailbox -Identity "Sales Team" -GrantSendOnBehalfTo "Tiago.Carvalho"
Step 3: Accessing the Shared Mailbox
Once permissions are assigned, users can access the shared mailbox in Outlook:
- Automapping: By default, shared mailboxes with Full Access permissions are automatically added to the user's Outlook profile within 60 minutes. No manual configuration is required.
- Manual Addition: If automapping is disabled or the mailbox doesn't appear, users can manually add it in Outlook by going to File > Account Settings > Account Settings > Change > More Settings > Advanced > Add.
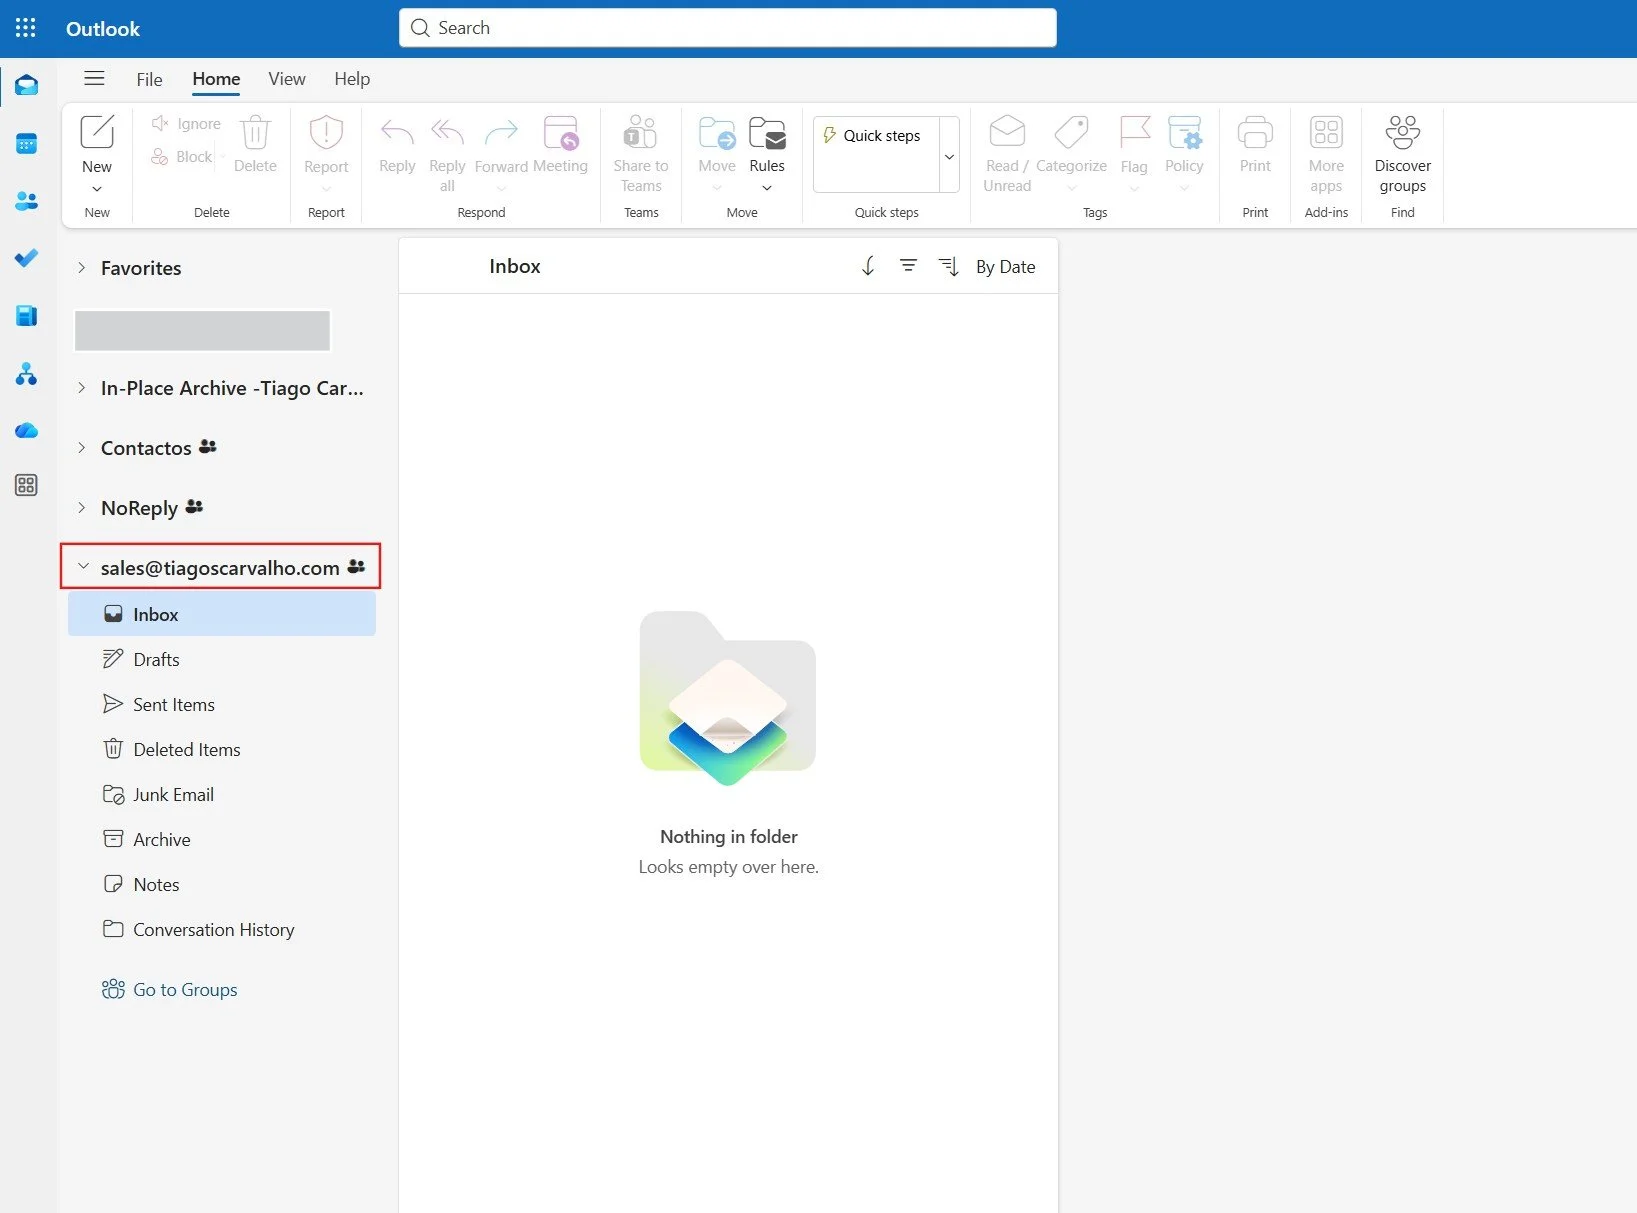
Figure 3: The shared mailbox automatically appearing in Outlook on the web
Best Practices
To ensure your shared mailboxes are secure, efficient, and easy to manage, follow these best practices:
- Disable Direct Sign-In: Shared mailboxes should not be used for direct login. Block sign-in to prevent unauthorized access and ensure all access is audited through delegated permissions.
- Use Groups for Permissions: Instead of assigning permissions to individual users, create a security group or Microsoft 365 group and assign permissions to the group. This simplifies management and improves scalability.
- Monitor Mailbox Size: Keep an eye on the mailbox size to ensure it stays under 50 GB (unless you have a license). Use retention policies to automatically archive or delete old emails.
- Implement Email Retention Policies: Configure retention policies to automatically manage email lifecycle and prevent the mailbox from growing indefinitely.
- Regular Permission Audits: Periodically review who has access to shared mailboxes and remove permissions for users who no longer need them.
⚠️ Common Mistakes to Avoid
Prevent these critical errors that can compromise security, performance, and user experience:
- Granting Full Access to external users: Never give external users access to shared mailboxes. This creates a significant security risk and violates most compliance policies.
- Not blocking direct sign-in: Failing to block sign-in allows users to log in directly to the shared mailbox, bypassing audit trails and creating accountability issues.
- Assigning licenses unnecessarily: Most shared mailboxes don't need a license. Only assign one if the mailbox exceeds 50 GB, needs In-Place Archive, or requires Litigation Hold.
- Confusing Send As and Send on Behalf: These permissions have different use cases. Send As creates a unified identity, while Send on Behalf provides transparency. Choose the right one for your scenario.
- Assigning permissions to too many individual users: Managing permissions for 30+ individual users creates a performance and management nightmare. Use security groups instead.
Conclusion
Shared mailboxes are a powerful tool for team collaboration in Exchange Online, but they require proper configuration to be effective. By understanding the three types of permissions (Full Access, Send As, and Send on Behalf), following best practices, and avoiding common mistakes, you can transform your shared mailboxes from a source of chaos into a streamlined collaboration hub.
Whether you're managing a small support team or a large sales organization, mastering shared mailboxes will improve response times, enhance accountability, and provide a professional experience for your customers and partners.